
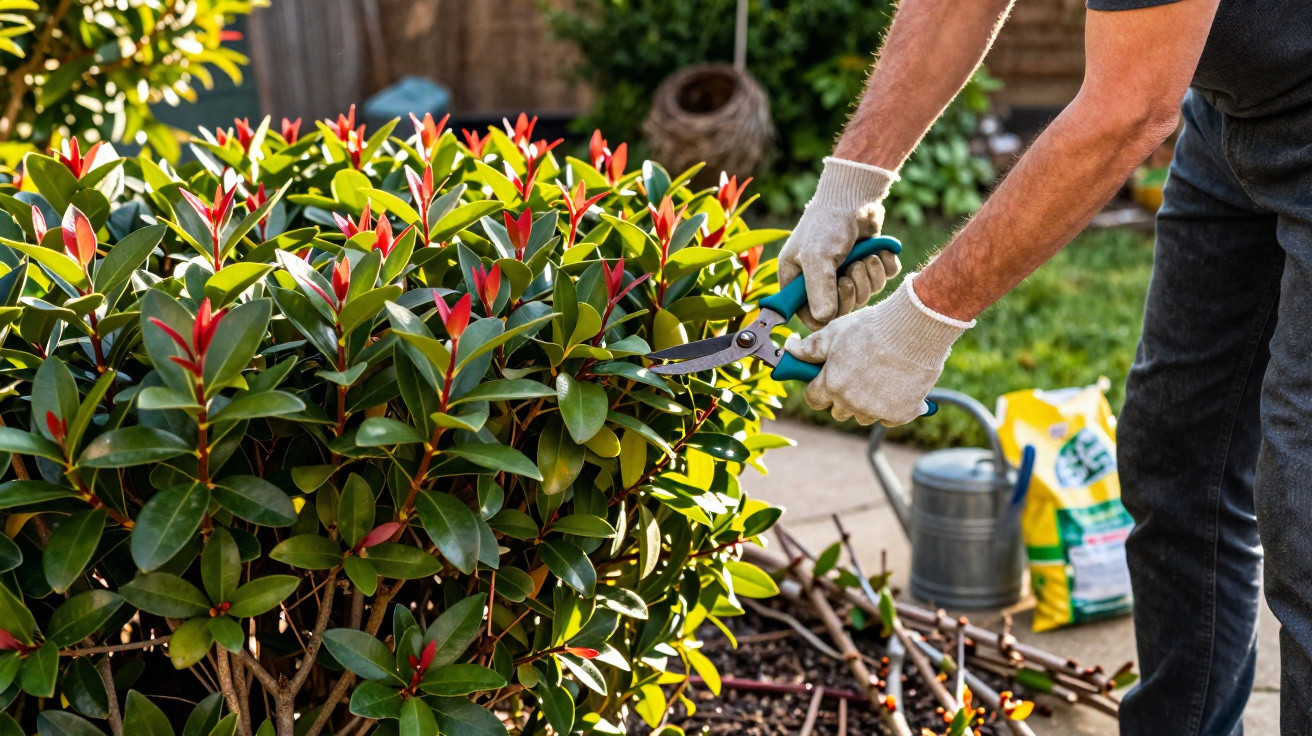
A single, common pruning mistake can ruin the very effect you want.
If you let your Photinia hedge grow unchecked, or you cut it at the wrong time, you will quickly end up with bare patches, shoots that get too tall, and a loss of privacy. Follow a few straightforward rules on timing and technique, and your hedge will stay dense, richly coloured and healthy.
The biggest trap: pruning at the wrong time - or not at all
Most Photinia hedges in gardens are Photinia × fraseri ‘Red Robin’. This cultivar grows extremely fast, produces bright red new growth, and is often planted as a privacy screen along property boundaries. That same vigour, however, causes trouble if nobody ever reaches for the shears.
"If you do not prune your Photinia hedge regularly for years, you risk a tall wall that is dense at the top and bare at the bottom - and your privacy screen is gone."
The classic mistake is letting the hedge “just grow for now”, or hacking it back brutally every few years with an electric hedge trimmer. The results are easy to spot:
- the hedge rockets up to 3 metres or more
- it becomes increasingly sparse at the bottom and ever denser at the top
- the red new growth appears less often and unevenly
- diseased wood and fungal problems become more common
Once it gets to this point, bringing the plants back into shape takes a lot of work. It is far smarter to start with regular, moderate pruning from the beginning.
Why regular pruning is essential for Photinia
Photinia responds strongly to any cut. You can use that to your advantage - or, without realising it, you can end up working against the plant. There are several reasons to keep on top of hedge care.
A dense base instead of bare “legs”
Without intervention, the shoots focus on upward growth, and very little light reaches the lower sections. As a result, the foliage at the bottom gradually drops, and new buds form mainly higher up where there is light. Pruning every year slows this process and helps the hedge stay green from bottom to top.
More red new growth, less monotony in the border
Photinia’s signature feature is its red spring flush. Each clean cut encourages fresh shoots, which shine a ruby red at first before darkening. If you prune thoughtfully, you can trigger this colour change several times a year and make the garden look far more lively.
Supporting plant health
Cutting back also automatically removes:
- old, dead wood
- hardened, damaged or torn shoots
- branches that cross or rub against each other
This improves air circulation through the hedge. Damp leaves dry more quickly, and fungal diseases such as leaf spot spread far less readily. At the same time, the risk of pests decreases, as they often hide in dense, poorly ventilated hedges.
The right timing: when pruning Photinia truly makes sense
Photinia is forgiving in many ways, but timing matters - a small shift can make a big difference, especially if you are trying to balance flowers, red foliage and wildlife protection.
Main season: spring to early autumn
As a general rule, the pruning window runs from April to September. During this period the hedge is actively growing and closes wounds quickly. A rough annual plan looks like this:
| Month | Type of cut | Aim |
|---|---|---|
| Late March / April | Renovation or shaping cut | Limit height, clarify structure |
| June / July | Main cut after flowering | Encourage density, stimulate red new shoots |
| September | Light follow-up trim | Correct the line, remove vigorous stray shoots |
If you only want to prune once a year, a cut in July is usually the best choice. The white flowers are finished, the plants have enough strength, and the new growth still has time to mature properly before winter.
The grey area: bird nesting protection
Hedges such as Photinia provide breeding and shelter for many birds. In several countries, agriculture already follows strict cutting bans from mid-March to mid-August. Home gardeners are also well advised to inspect the hedge carefully before any pruning.
"A quick look into the hedge before you start cutting helps prevent nests with chicks from being disturbed or destroyed."
If you want to avoid major work during the main nesting season, move the stronger shaping cut to shortly before or directly after this period, and keep summer work to minimal corrections.
Step by step: how to achieve the perfect Photinia prune
You do not need professional equipment for a neat hedge. What matters far more is clean tools and a clear method.
The right tools
- hand secateurs for individual branches and detailed work
- hedge shears (manual or electric) for the larger faces
- a sturdy string line or batten to mark the height
- alcohol or disinfectant for cleaning the blades
Electric hedge trimmers save time, but they can shred shoots if the blades are blunt. Clean cuts heal faster and reduce the risk of infection.
Make it healthy first, then shape it
Start by tidying the inside of the hedge. This makes the shaping work easier afterwards and lets more light into the shrub.
- Remove any dead, dark or brittle branches right down at the base.
- Cut out shoots that look diseased or show spotting completely.
- Thin out shoots that are packed too tightly and crowd each other.
- Take out branches that grow strongly inwards or that cross.
The supporting “framework” of the hedge should remain intact. The goal is not a drastic strip-back, but more light, air and order within.
Shape and height: remove no more than one third
Next, work on the outer outline. A taut string at the intended final height helps - for example 1.80 or 2 metres, depending on your plot.
- Start with the sides, keeping the base slightly wider than the top.
- Then trim the top along the string line.
- With each cut, take off no more than one third of the shoot length.
If you cut too hard, you stress the plants unnecessarily, regrowth slows down, and gaps remain visible for longer. Several smaller cuts spread across the season work far better than a brutal intervention every few years.
What to do with severely neglected hedges
If you are faced with a Photinia barrier that has shot up high and is bare at the bottom, you will need patience and a renovation plan over two to three years. Photinia can survive being cut back into old wood, but there is a chance individual plants may fail completely.
A sensible approach is:
- In the first year, reduce height clearly, but not to extremes.
- Remove heavily ageing branches gradually, close to ground level.
- Fill gaps with young Photinia plants or evergreen companion shrubs.
- Water well and provide a light feed with organic fertiliser in spring.
This rejuvenates the hedge step by step without it losing its screening function entirely.
Aftercare following pruning: water, feed and hygiene
After a heavier cut, Photinia needs support. Fresh wounds combined with drought and nutrient shortage can otherwise become a risky mix. The key points are:
- water thoroughly in the weeks afterwards, especially during hot weather
- apply a thin layer of mulch over the root area to reduce drying out
- use a moderate, organic general-purpose fertiliser in spring
- remove and dispose of diseased prunings consistently
Leaves with obvious spots or badly distorted shoots should not go on the compost heap. Put them in general waste or your local council food and garden waste bin, so fungi and pests do not continue spreading.
Practical additions: position, combinations and risks
Photinia does best in sunny to partially shaded spots and in free-draining soil that is not overly wet. In heavy, waterlogged ground, plants struggle, fungal pressure increases, and even correct pruning can do little to save the hedge. Adding drainage or mixing in coarse sand can make a real difference here.
It becomes particularly interesting if you mix Photinia with other evergreen shrubs: cherry laurel, Portuguese laurel, Photinia varieties with a different leaf tone, or even semi-evergreen spindle species can add variety in colour, texture and flowering time. The hedge looks more natural and is less vulnerable if one plant type has a bad year.
If you prune very strictly and frequently, keep in mind that every cut costs the plant energy. In dry years or on very poor sites, it can be sensible to skip a planned second cut and give the hedge a rest - as long as the height is still acceptable.
In the end, there is no single “perfect” Photinia hedge. Some gardeners value the white flowers most, others want maximum red new growth, and others prioritise uncompromising privacy. With the right timing, moderate tool use and a watchful eye on the plants, any of these goals is achievable - without falling into the classic pruning trap that turns a dream hedge into a problem area.
Comments
No comments yet. Be the first to comment!
Leave a Comment