
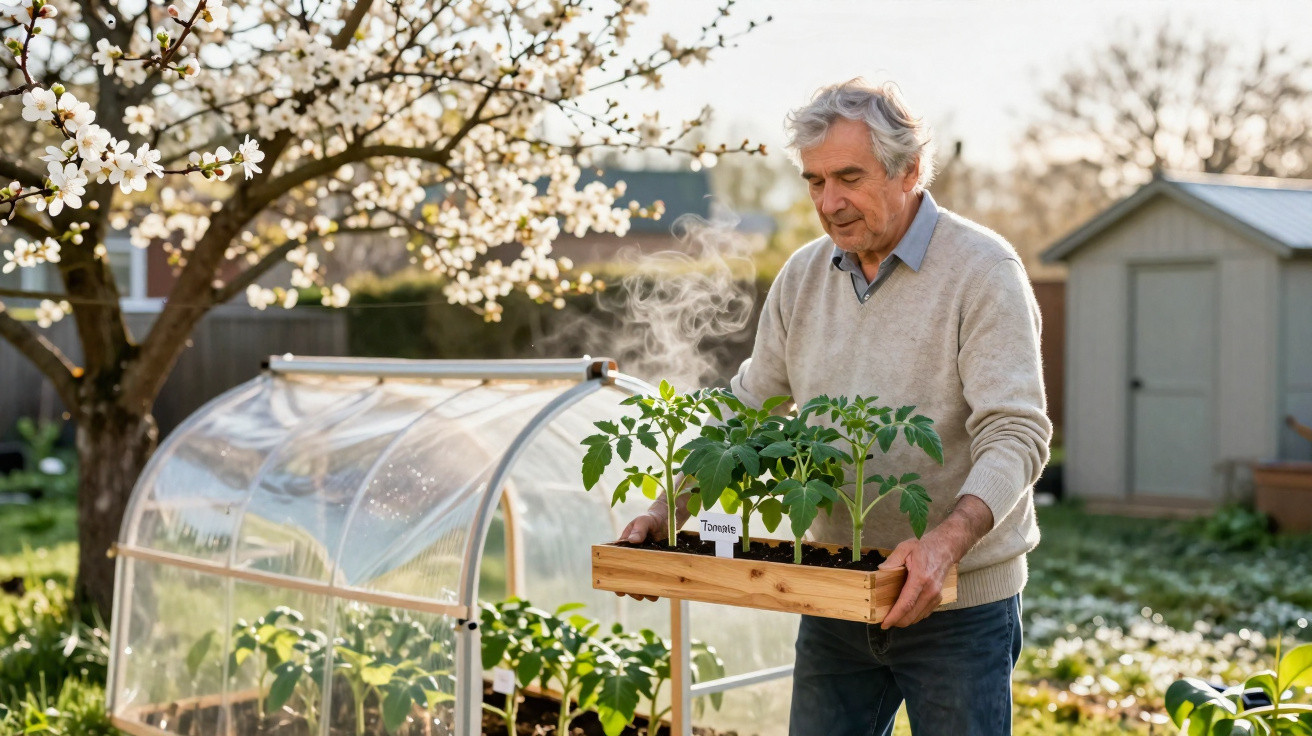
Professionals swear by a simple trick.
The first warm days send people to garden centres, trolleys loaded with young tomato plants and fresh compost. You can’t wait to get started. But anyone who rushes and plants tomatoes straight outdoors often pays for it with weak plants and a thin harvest. That’s why commercial growers follow a clear ritual before a single tomato goes into the soil - a modest step that can make the difference between a thriving summer and months of frustration.
Why tomatoes fail when they go outdoors too early
Temperature shock: from living-room warmth to a cold spring night
Most tomato plants begin life under cover: on a windowsill, in a conservatory, or in a warm greenhouse. Temperatures there are fairly steady at around 18–22 °C. Hardly any wind, no cold nights, no sudden drops.
Move those plants straight into a bed and they end up in a completely different world: sunshine by day, but often only 5–6 °C at night, plus damp air. This abrupt change puts young plants under stress. Growth stalls, leaves may look limp, and the plant effectively “freezes from the inside”.
Tomatoes planted outdoors without any preparation often respond with stalled growth, leaf problems and a permanently weakened development.
The impact isn’t limited to the first few days - it can drag on for the entire season. Plants stay smaller, set fewer flowers and produce fewer fruits.
Weak stems: no wind experience - then the first gust arrives
There are no strong gusts in the living room. The plant doesn’t need to strengthen its stem, so it often grows thin, soft and overly tall. Then a brisk wind sweeps through the bed and the tomato bends over or collapses onto the ground.
Long, “leggy” young plants are especially at risk. They’re full of water but poorly supported. Once bent, they rarely straighten properly again. This is exactly where professionals and beginners start to diverge.
The professional trick: harden off tomato plants on purpose
Final hardening: daily trips outdoors instead of a shock move
Gardeners call it “hardening off” or “final hardening”: you acclimatise plants step by step to wind, sun and cooler air. It doesn’t require any complicated kit - just a straightforward daily routine.
The principle is simple: at first, tomatoes go outside for a short spell, then back into warmth. That way, the plant’s metabolism adjusts gradually. It produces more lignin - a fibrous substance that thickens and strengthens the stem.
- Day 1–2: 1–2 hours outdoors, sheltered from wind, out of harsh midday sun
- Day 3–4: 3–4 hours outside, allow a light airflow
- Day 5–7: half a day outdoors, partly sunny; bring back under cover overnight
- Day 8–10: a full day outside; only bring in if there’s a risk of frost
Often, just three to four days is enough for stems to look noticeably thicker and firmer. After one to two weeks, plants stand far more solidly and cope with planting out much better.
Avoiding light shock: ease leaves into full sun
Tomatoes raised behind glass only know filtered light. Outside, sunlight hits leaves directly. Put young plants into midday sun without acclimatisation and the foliage can look literally “scorched”: yellow patches that later turn brown, crisp edges, drooping leaves.
To prevent this, professionals begin in partial shade or behind a light fleece. Only after a few days do the plants move into progressively sunnier positions. This gives the leaf tissue time to adapt to the higher intensity.
Anyone who treats tomatoes like sun worshippers and places them straight into the midday heat risks sunburned leaves and a clear setback in growth.
An invisible garden risk: late frost on fruit trees
Keep an eye on blossom - ideally early in the morning
While tomatoes are being prepared for their move, a second, quieter drama can unfold in the fruit garden. Cherry or plum trees often bloom while nights can still be uncomfortably cold. Once blossoms are frosted, it usually means: no fruit.
If you take your garden seriously, check blossom early in the morning. If flowers look limp, glassy or discoloured, that can indicate frost damage. A particularly telling sign is a darkened or blackened stigma inside the bloom.
Spot late frost early - and respond with purpose
When forecasts warn of cold nights, it pays to look at fruit trees both the day before and the morning after. If you notice the first signs of damage, plan to act when the next cold snap comes:
- Cover small trees with purpose-made hoods or plastic sheeting
- Wrap sensitive shrubs in horticultural fleece
- Move container plants up against a sheltered house wall
This can save at least the most vulnerable specimens. The effort often only spans a few nights each year, but it decides whether you harvest fruit in summer - or just look at leaves.
Spring routine: how gardeners organise the transition phase
A simple emergency mini-greenhouse for cool nights
Hauling crates of seedlings back into the house every evening quickly becomes tedious. That’s why many hobby gardeners put together a small temporary shelter: a basic wooden or metal frame covered with plastic, or topped with an old window. It stays open during the day and gets closed at night.
This keeps tomatoes close to their eventual planting spot while giving them a small heat “cloche” for critical nights. A few bricks, old pallets and a sturdy sheet are often enough to improvise a working cold frame.
Consistent rhythm: out by day, in when frost threatens
Consistency is what matters. Plants should go out as often as possible, but they must not spend even one frosty night unprotected. Many gardeners follow this pattern:
- Morning: take plants out of the shelter and place them somewhere bright and protected
- Afternoon: check them - if winds pick up, move them closer to a wall
- Evening: depending on the forecast, bring them into the house, garage or under cover
This daily “gymnastics” lasts around ten to fifteen days, until the traditional late frosts have passed and the risk drops noticeably. Only then do experienced gardeners plant tomatoes permanently into beds or into large pots.
How to tell when tomatoes are genuinely ready to plant
Signs you’ve hit the right moment
Rather than blindly relying on a calendar date, it’s worth checking several factors:
| Criterion | What’s ideal |
|---|---|
| Plant appearance | Strong, more compact young plants with a thicker stem |
| Weather pattern | Several frost-free nights in a row, with a stable forecast |
| Soil temperature | Soil feels clearly cool during the day, but no longer cold |
| Light acclimatisation | Plants have already spent several hours a day in full brightness |
When these signs line up, there’s little standing in the way of planting out. Tomatoes start without shock, root in faster and resume growth immediately.
How professionals actually plant tomatoes into the ground
When it comes to planting itself, many gardeners use a few additional tricks:
- Plant tomatoes a little deeper so they can form extra roots along the stem
- Shape a watering rim so water doesn’t run off
- Protect plants from wind and strong sun for the first few days after planting
If you’ve hardened them off properly beforehand, the difference is obvious: tomatoes barely droop after planting, stand back up quickly and push out new leaves sooner.
More yield, less frustration: why the effort is worth it
The extra work over these few spring weeks repays you many times over later. Hardened-off plants typically set more trusses, stay steadier in summer thunderstorms and cope better with heatwaves. In a home garden, it’s exactly the accumulation of small details like this that separates “a few tomatoes” from bowls full of fruit.
Anyone who has seen how tough tomatoes become after a proper hardening-off phase often changes their routine for good. Instead of “get them into the bed as early as possible”, the approach becomes: step by step, based on the weather, with an eye on both plant and soil. One small trick - and in summer the harvest baskets suddenly look very different.
Comments
No comments yet. Be the first to comment!
Leave a Comment