
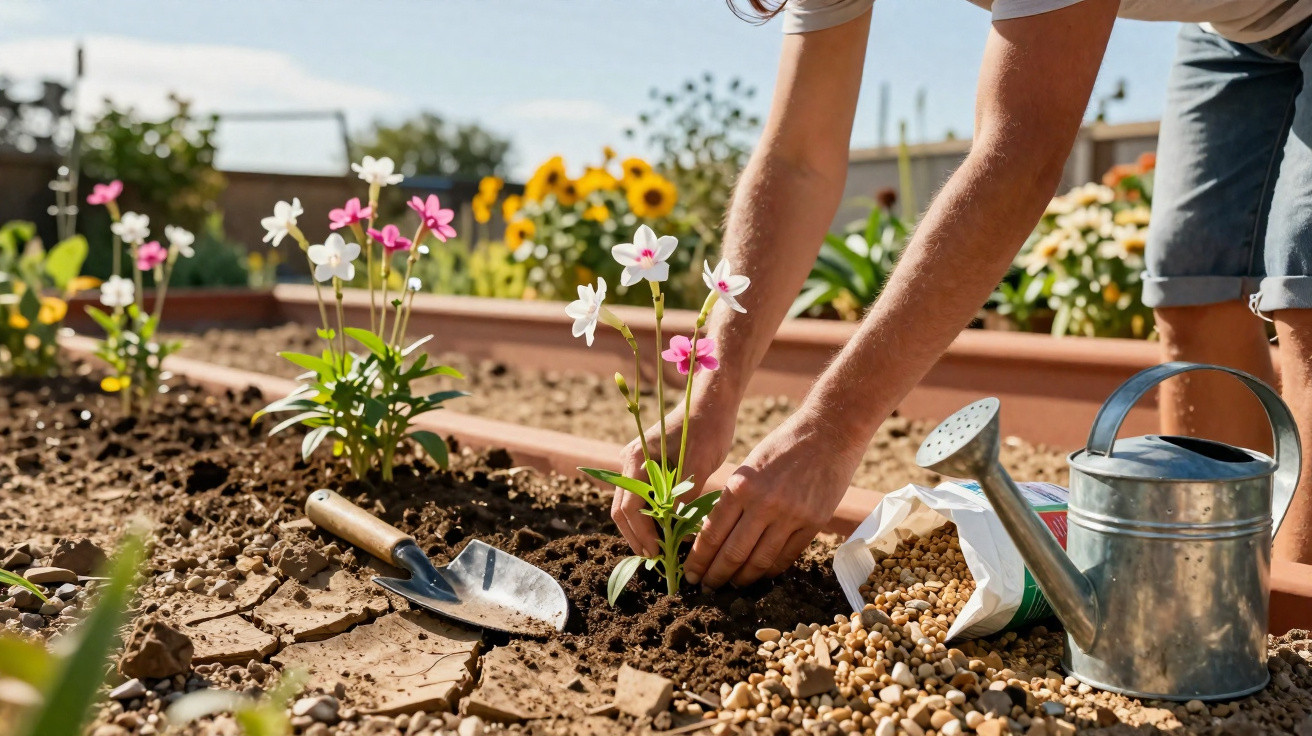
Increasingly scorching summers are turning watering into both a patience test and a cost issue. That is why many amateur gardeners are hunting for plants that cope calmly with heat and drought. One rather understated yet highly useful perennial fits the bill: gaura, often known as the splendid candle. If you take a few targeted steps in April, it becomes close to indestructible - even in a bone-dry gravel bed.
Why April matters so much
In April, the soil begins to warm up without the full force of summer heat. At the same time, many areas still receive regular spring rainfall. Gaura makes the most of this combination to establish strong, deep roots.
This plant forms taproots that grow straight down. That allows it, even in mid-summer, to reach moisture deeper in the ground that many other perennials can no longer access.
"Anyone who plants or divides gaura in April gives the perennial several weeks’ head start - and lays the foundation for genuine heat protection from below."
Getting going early in the year means gaura can settle in without pressure before the long dry spells arrive. Planting later, in May or June, often puts it under strain quickly, increases the need for watering, and can result in a shallower root system.
Location and soil: the non-negotiable basics
Gaura originates from relatively sparse, sunny parts of North America. In the garden it behaves in much the same way: plenty of light, little wetness, and an open soil structure suit it best.
Full sun rather than partial shade
This perennial needs strong light to stay sturdy and flower well. A truly sunny position helps the stems remain upright and keeps the characteristic, lightly dancing outline.
- Ideal: a south- or west-facing spot, unshaded, with at least six hours of sun per day
- Acceptable: bright, lightly shaded positions, though flowering will be somewhat reduced
- Problematic: dense shade, where gaura becomes leggy and produces few flowers
Drainage is essential, not optional
Gaura does not tolerate wet feet. Persistently damp soil quickly leads to root rot. If your garden has heavy, clay-rich ground, you will need to improve it before planting.
Useful steps:
- Work coarse sand or grit into the planting hole
- Check that excess water can drain away: waterlogging must not occur
- Avoid planting in hollows where rainwater collects
"A well-drained, rather lean soil makes gaura longer-lived than any expensive fertiliser."
Planting gaura in April: step by step towards a drought champion
Choose the spot and prepare the ground
Start by selecting a sunny site - ideally in a rock garden, a gravel bed, or along the dry edge of a mixed border. Allow around 40 to 60 centimetres between plants, depending on the variety and how dense you want the planting to be.
Proceed as follows:
- Dig a planting hole about twice as wide as the root ball and roughly the same depth.
- If the soil is heavy, add around one litre of gravel or coarse sand to the bottom of the hole.
- Mix the excavated soil with two litres of loose, slightly sandy growing medium or fine gravel.
This blend helps rain and irrigation water drain away quickly, while still giving the roots a fine structure to grow into.
Set at the right depth - and water only once
Position the root ball so its top sits exactly level with the surrounding soil. Planting too deep, especially in wet springs, can easily encourage rot.
Then backfill with the loosened soil from the sides and firm it gently so no large air pockets remain. Immediately afterwards, give a solid initial drink: about two litres of water per plant.
"The first watering after planting is essential - then it’s time to put the watering can away and let the roots get on with it."
That one thorough watering ensures good root-to-soil contact. After that, gaura should not be constantly fussed over. Short dry spells push the roots to travel downwards - which is exactly what later makes the plant so drought tolerant.
Dividing old clumps: an April refresh for renewed vigour
Older gaura plants often become bare in the centre. Flowering shifts to the outer ring and the middle starts to look tired. Dividing the plant resolves this - and April is, again, the best moment.
How to rejuvenate successfully:
- Use a spade to cut generously around the plant and lift the root ball.
- Split the root ball into three to four sections, for example using a sharp spade blade.
- Make sure each piece has its own roots and a few young shoots.
- Replant the divisions straight away, either in new positions or back into the same bed.
- Water each section in with one to two litres of water.
Once that initial help is done, the watering can should go back in the shed. April usually provides enough natural moisture for the divisions to re-establish.
The single summer cut that keeps flowering going into autumn
When the first flush of blooms fades in high summer, gaura can start to look a little worn. That is precisely when the key summer prune should happen.
Use clean secateurs and cut back roughly half of the stems quite hard. It may feel drastic, but it triggers a strong new burst of growth.
"After pruning, the perennial pushes fresh shoots - followed by a second, long flowering period right up to the first frosts."
Additional feeding is generally unnecessary. Too many nutrients make gaura soft and prone to problems rather than tough and drought tolerant. If you wish, you can lightly work in a thin layer of mature compost after cutting back.
Common mistakes that make life harder for gaura
This perennial does not demand much attention. However, a few recurring everyday errors can undermine it - and they are easy to avoid.
- Constantly wet soil: waterlogging encourages root rot and can cause the plant to collapse.
- Too little light: in shade, gaura stretches, flowers less, and flops more readily.
- No pruning: without the summer cut, flowering time is noticeably shorter and the plant ages faster.
If you steer clear of these pitfalls, gaura often provides years of colourful display with very little work.
What to do in winter - and which plants pair well with gaura
In autumn, you can cut the plant back to 10 to 15 centimetres above ground level. In milder parts of the UK it may even overwinter partly green. In very cold locations, a light winter mulch of leaves or bark around the root area can help.
One point remains important even in winter: the soil must not become waterlogged. In places where moisture stands, the risk of losses is far higher than damage from frost alone.
From a design perspective, gaura combines beautifully with perennials and grasses that like similar conditions, such as:
- Lavender
- Catmint
- Sage varieties
- Ornamental grasses such as feather grass or fountain grass
- Thyme and other Mediterranean herbs
These combinations bring movement to a border, manage on little water, and still feel lively rather than barren.
Practical pointers for a less stressful gardening routine
Many home gardeners underestimate how much a smart planting date can reduce summer watering. If you plant gaura in April, you can get through the hot period in many regions with noticeably less effort at the tap.
It is also a strong choice for anyone who travels frequently for work or only has weekend time for the garden. Once established, gaura tolerates longer dry stretches in which many other perennials would already be wilting.
Another advantage: gaura attracts plenty of insects. Its airy flowers provide a welcome landing spot for bees and butterflies, without making the garden look like an unmanaged wasteland. Particularly in front gardens that currently consist of gravel areas and uniform evergreen planting, this perennial brings back colour and life - with very little extra maintenance.
If you are considering making your garden more heat-ready, planting a few gaura is an easy way to try it out. With modest effort in April, you create a perennial backbone that copes far more calmly with summer heat, lack of water, and short holidays than many traditional bedding plants.


Comments
No comments yet. Be the first to comment!
Leave a Comment