
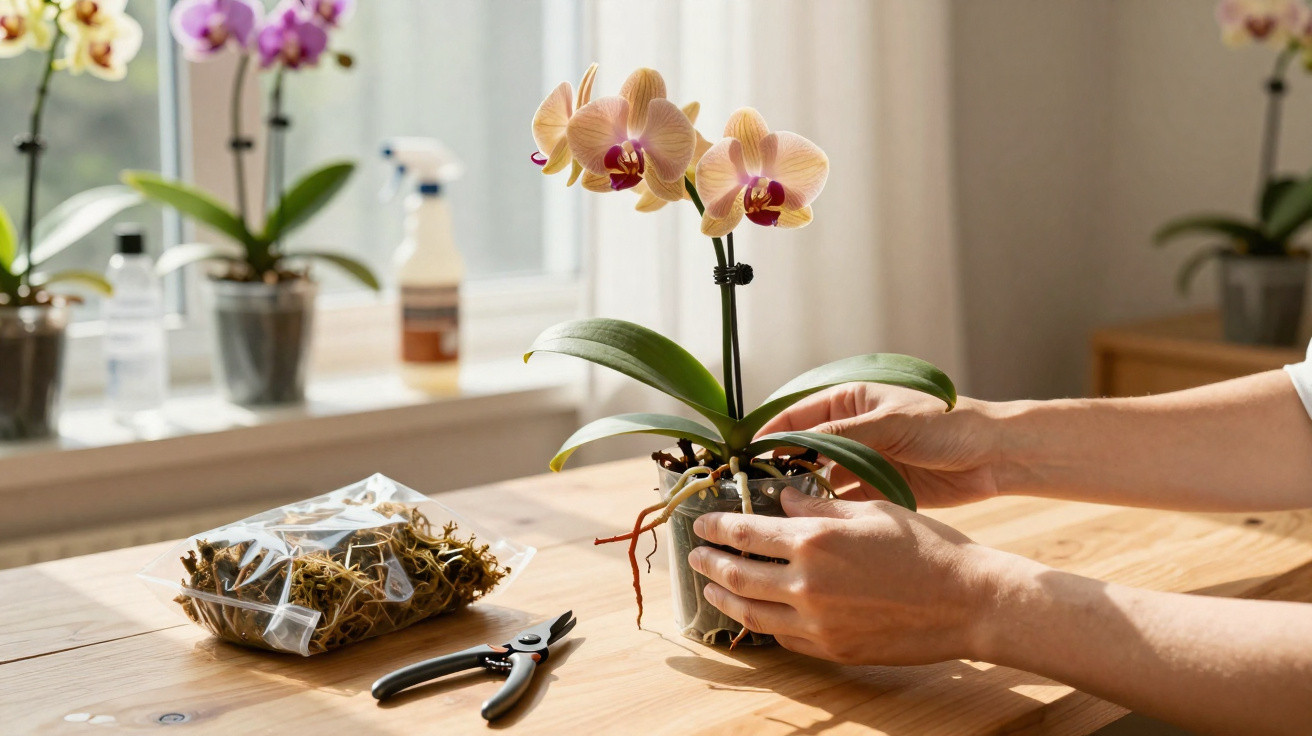
Not everything is lost yet - provided you act correctly now.
Many orchid owners know the surge of panic when what was once lush green growth suddenly droops. Instead of firm, plump leaves, the plant develops limp, wrinkled, softened flaps. It can look like simple drought, but very often something else is going on underneath. If your only thought at this point is “water more”, you can quickly make the situation worse. With a clear rescue plan, many of these plants can still be brought back to stability.
Soft, wrinkled leaves: what your orchid is trying to tell you
When a Phalaenopsis develops soft leaves that sink in and form creases, the plant is short of water inside its tissues. Pressure in the plant cells drops, so the leaves can no longer hold themselves upright. To an owner, that feels like thirst - yet in many cases the real issue is the roots, not the watering can.
Common causes include:
- Root rot caused by potting mix that stays wet for too long
- Severe dryness from watering too infrequently
- Extremely dry air near radiators or at south-facing windows
- Unsuitable potting mix that traps water and prevents drainage
“Soft, wrinkled leaves are a clear warning sign: the water supply line between root and leaf is disrupted - and time is running out.”
If you respond promptly and precisely, you can often steady the plant again. First, though, you need a diagnosis before you water, feed, or cut anything.
Quick diagnosis: how to check roots, potting mix, and position
A look inside the pot determines which rescue approach fits. With transparent plastic pots you can see a lot immediately; with opaque pots, carefully removing the plant is often the best way.
Assessing roots correctly
Typical signs around the root zone:
- Healthy roots: firm and full, silvery to green, with pale tips
- Rotten roots: brown, mushy, hollow, often with a musty smell
- Completely dried-out roots: grey, hard, brittle
If the entire crown of leaves shifts when you lightly tap it, the stem base (root neck) may be damaged. In that situation, remove the plant from the pot and inspect the base. A stable, firm attachment point suggests good chances; a base that has turned soft or is starting to rot is critical.
Checking the environment and care conditions
Beyond the roots, the orchid’s “living-room climate” matters greatly. Ideally, provide:
- A bright spot without harsh midday sun
- Temperatures usually between 18 and 22 °C
- Humidity of around 50 to 70%
- Soft, low-limescale water
With pure dehydration and no root rot, a soft-water soak is often enough: place the pot in lukewarm water for 10 to 30 minutes, then let it drain thoroughly, and only water again when the potting mix is almost dry. A rigid calendar-based watering routine is risky. Better: always check with a finger test or by judging the pot’s weight.
If leaves are soft and roots are rotting: a step-by-step rescue
If the roots show clear rot, a simple soak will not be sufficient. In that case, the orchid needs something closer to an emergency procedure.
Root surgery for weakened Phalaenopsis
- Gently lift the plant out of the pot and shake off the old potting mix.
- Remove all mushy, hollow, or blackened roots using disinfected scissors or a sharp knife.
- Keep only firm, pale roots.
- Dust the cut surfaces lightly with ground cinnamon to slow fungal growth.
- Leave the plant to air-dry for a few hours.
Afterwards, the patient needs a new home. Use a dedicated orchid potting mix made from coarse bark, a little moss, and optionally a small amount of charcoal. This blend lets water drain quickly while still holding enough moisture in the air spaces.
During the first few weeks after repotting, water very sparingly. The mix should be slightly moist, but never soaking wet. If the pot starts to smell musty or earthy, treat it as a warning sign of fresh rot.
Intensive care in a plastic bag: when hardly any roots remain
If the orchid is almost rootless and the leaves feel like tough leather, you’ll need a more radical approach: a kind of humidity tent.
How the clear-bag method works:
- Remove all rotten roots and clean the plant.
- Place a layer of lightly dampened sphagnum moss fibres on the bottom of a transparent bag.
- Set the orchid on top of the moss without burying it.
- Seal the bag and blow a little air into it so a small “greenhouse” forms.
- Put or lay the bag in a bright (but not sunny) place at around 20 to 22 °C.
“Inside a sealed bag, humidity is close to 100%. The leaves take up moisture while new roots can form at the base.”
In many cases, it takes three to four weeks before fresh root tips appear. After that, open the bag gradually so the plant can adapt to normal humidity. Only once several new, sturdy roots have formed should it move into fresh orchid potting mix.
Preventing relapses: a simple care routine for firm leaves
Once the plant has recovered, a straightforward routine helps stop new bouts of limp leaves.
Water properly rather than drowning it
Many Phalaenopsis don’t die of thirst - they die of “good intentions”. A few basic rules make water supply far more reliable:
- Only water when the potting mix is almost dry (finger test or weight test).
- Rinse the pot thoroughly in the sink, then allow it to drain completely.
- Never leave water standing in the outer pot or saucer.
- Avoid heavy showers directly into leaf joints - trapped water there encourages rot.
In very dry, centrally heated air, a tray filled with pebbles and water beneath the pot can help. The evaporating water raises humidity without leaving the roots sitting in water.
A position that avoids stress
A bright bathroom window, an east- or west-facing window in a living space, or a spot slightly back from a south-facing window can all work well. Direct midday sun scorches leaves and drains the extra energy the plant needs for roots and foliage.
Draughts, constantly changing temperatures, and dry air directly above radiators all create stress. If you still want to place an orchid there, use a humidifier nearby and be especially careful with watering.
Common mistakes - and how to spot them
Many limp-leaf issues come from trying too hard to help. A quick look at typical missteps makes them easier to avoid next time:
| Problem | Typical symptom | Better solution |
|---|---|---|
| “Rescue dunking” in a bucket of water | Roots rot; the smell turns musty | Short soaks, then let it drain completely |
| Constantly moist garden-centre compost | Mix clumps; roots get no air | Use a dedicated, coarse orchid potting mix |
| Cutting off leaves because they look unattractive | The plant loses reserves during recovery | Leave green leaves until they truly die back |
What is happening inside the plant?
A Phalaenopsis stores water not only in its roots, but above all in its fleshy leaves. When the root system fails, the plant draws down these reserves - one reason leaves become soft and wrinkled. At the same time, it tries to produce new roots at the base, as long as the growth zone is still healthy.
The bag method, or any approach that maintains very high humidity, supports this process: the leaves lose less water and can even absorb a small amount of moisture through their surface. That leaves the plant with more energy to push out new roots.
How much hope is realistic?
Your chances are best when the leaf base and at least some roots are still firm. Full, green leaves that are only slightly limp can usually be stabilised again. Fully yellow, mushy, or blackened leaves, by contrast, indicate that the tissue has already died back over a wide area.
If you intervene early, check the causes honestly, and avoid watering “just in case”, Phalaenopsis often responds better than you might expect. This genus is tougher than its delicate appearance suggests - as long as you take its signals seriously and bring water, air, and light back into balance.
Comments
No comments yet. Be the first to comment!
Leave a Comment