
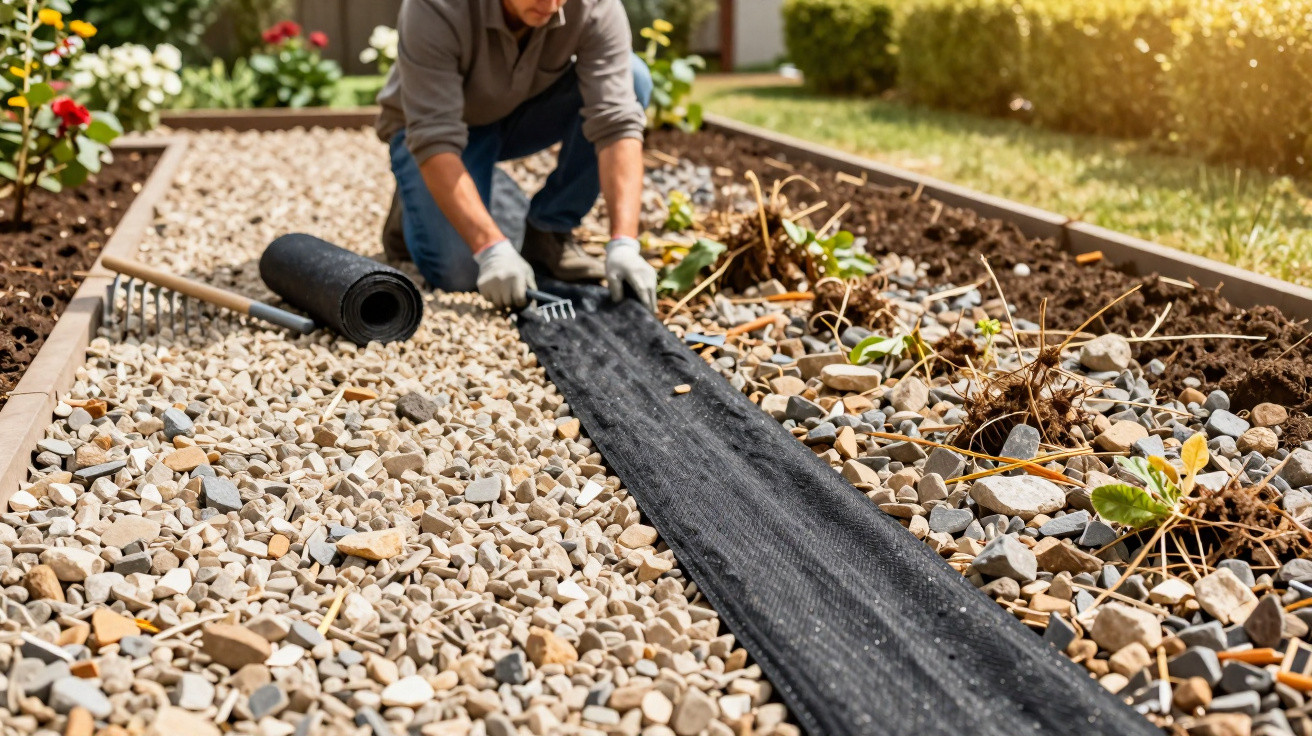
A straightforward professional approach can finally keep gravel permanently weed-free.
Gravel paths and gravelled areas look smart, are meant to be low-maintenance, and suit contemporary homes perfectly. In practice, though, countless gardeners face the same issue every year: within a few weeks, dandelions, grass and other unwanted plants push up through the gravel as if nobody had tidied up at all. Professional landscapers rely on a method that is still used far too rarely in private gardens - and it’s this exact approach that leaves weeds in gravel with virtually no chance.
Why so many weeds grow in gravel
At first glance, gravel seems like a natural barrier. The stones sit closely together, the soil beneath appears covered - yet plants often thrive there with surprising persistence. Most of the time, the problem isn’t the gravel; it’s what lies underneath.
There are always tiny gaps between the stones. Seeds are constantly brought in by wind, birds and other animals. Rain then washes fine soil particles and organic debris into those gaps. Over time, this builds a thin but highly fertile layer where seeds readily germinate.
What matters isn’t the gravel layer, but the soil underneath: if it’s nutrient-rich and damp, wild plants have ideal conditions.
It becomes particularly troublesome when the base wasn’t properly prepared when the gravel area was created. Loose, humus-rich soil - perhaps even with old turf still beneath - effectively invites weeds in. If you only “scrub” the surface, you’re repeatedly dealing with what you can see, rather than removing the cause.
The professional solution: geotextile under the gravel
That’s why landscapers typically work with a clear two-layer set-up: decorative gravel on top, and beneath it a barrier that prevents plants from growing through. The key component is a geotextile membrane - a tough sheet made from synthetic material.
This membrane allows water to pass through, but largely blocks plant roots. The soil underneath stays separated from the gravel layer, and weeds can’t simply force their way up.
How professionals do it step by step
- Clear the area completely: Dig out all existing plants including the roots, and remove old gravel layers if necessary. The more thorough you are here, the longer the area will stay trouble-free later.
- Level and compact the base: Smooth the soil, remove bumps and dips, and lightly compact the ground - for example with a plate compactor or firm tamping.
- Lay the geotextile: Roll the membrane out across the entire area and overlap the edges by about 10 centimetres so there are no gaps.
- Fix the edges neatly: Secure the membrane at borders and transitions with ground staples or stones so it doesn’t shift while you spread the gravel.
- Add the gravel: Tip on a layer of at least 5 centimetres - a little more for heavily used paths - and spread it evenly.
The initial effort is noticeable, but it’s a one-off job. Afterwards, upkeep drops to a minimum because very little can grow through.
With geotextile you create a clear separation: appearance on top, soil below - with a barrier in between that significantly slows unwanted greenery.
Natural methods for gravel areas that are already in place
If you already have a gravel path and don’t want to rebuild everything, gentler methods can still help. They won’t remove weeds forever, but they do make day-to-day maintenance much easier.
Heat, acid, salt: what actually works in everyday use
- Hot water: Pouring boiling water directly onto the plant damages leaves and roots. This is best for small areas or stubborn individual weeds.
- Household vinegar: Spraying a diluted vinegar solution onto the leaves dries the plant out. It’s most useful on young growth. Keep it away from ornamentals, as they can be affected too.
- Salt - with caution: Salt can kill plants reliably, but it also degrades the soil in the long term. It’s not suitable where the gravel connects to borders or lawn.
All of these natural options need repeating regularly because new seeds keep arriving. They’re mainly useful for keeping gravel areas looking tidy without changing the entire construction.
Preventing weeds: small routines, big impact
If you don’t want to start from scratch every year, it helps to establish a simple maintenance routine. That way the gravel stays cleaner for longer, and wild plants don’t get the chance to spread across the whole surface.
Regular upkeep instead of a big summer clear-out
- Rake the gravel: Once a month, lightly pull through with a rake. Newly germinated plants are often dislodged straight away.
- Remove fallen leaves: Leaves, needles and spent flowers can become a fertile growing medium over time. Clearing them early removes the weeds’ foundation.
- Keep an eye on the edges: At transitions to borders or lawn, roots often creep under the gravel. Those areas are worth checking particularly closely.
In some spots, planting can also help. Ground cover plants such as creeping phlox, thyme mats or low-growing sedum form dense carpets and leave less space for wild weeds. Combined with gravel, this can create interesting, lively areas that still look structured.
When a full rebuild is genuinely worth it
Many garden owners hesitate to redo an entire area, but in certain situations it’s the more relaxed long-term option - for example when:
- thick layers of soil and plant debris have already built up within the gravel,
- the area regularly sits under water or stays very damp,
- the base was never properly prepared and old turf is still underneath.
If you install geotextile in these cases, you can save yourself countless hours later on. The cost of materials - and any hired equipment - quickly pays off once you factor in the reduced maintenance.
Practical tips from everyday gardening
A common early mistake is choosing gravel that’s too fine. Small chippings clog up more quickly, hold moisture for longer, and more readily turn into a sort of “potting soil” between the stones. A slightly coarser grade usually stays drier, which makes life harder for wild weeds.
Colour matters too. Pale gravel reflects more light, so young shoots dry out faster. Dark gravel stores heat and can encourage germination. It won’t eliminate weeds entirely, but these small effects add up over time.
If you combine the base, the material and the maintenance sensibly, you can turn a constantly weedy gravel path into an area that is genuinely almost low-maintenance.
For heavily used areas such as driveways, a layered build often makes sense: a load-bearing sub-base of crushed stone, geotextile on top of that, and then a robust gravel layer. In less demanding parts of the garden, a simpler set-up with geotextile and light compaction is usually enough.
If you’re already spending hours pulling weeds every spring, a structured approach can give you a lot of time back. Whether you choose geotextile as the professional solution or stick with consistent, natural upkeep, an elegant gravel path doesn’t have to be a never-ending project - it can simply look good without constant weeding.

Comments
No comments yet. Be the first to comment!
Leave a Comment