
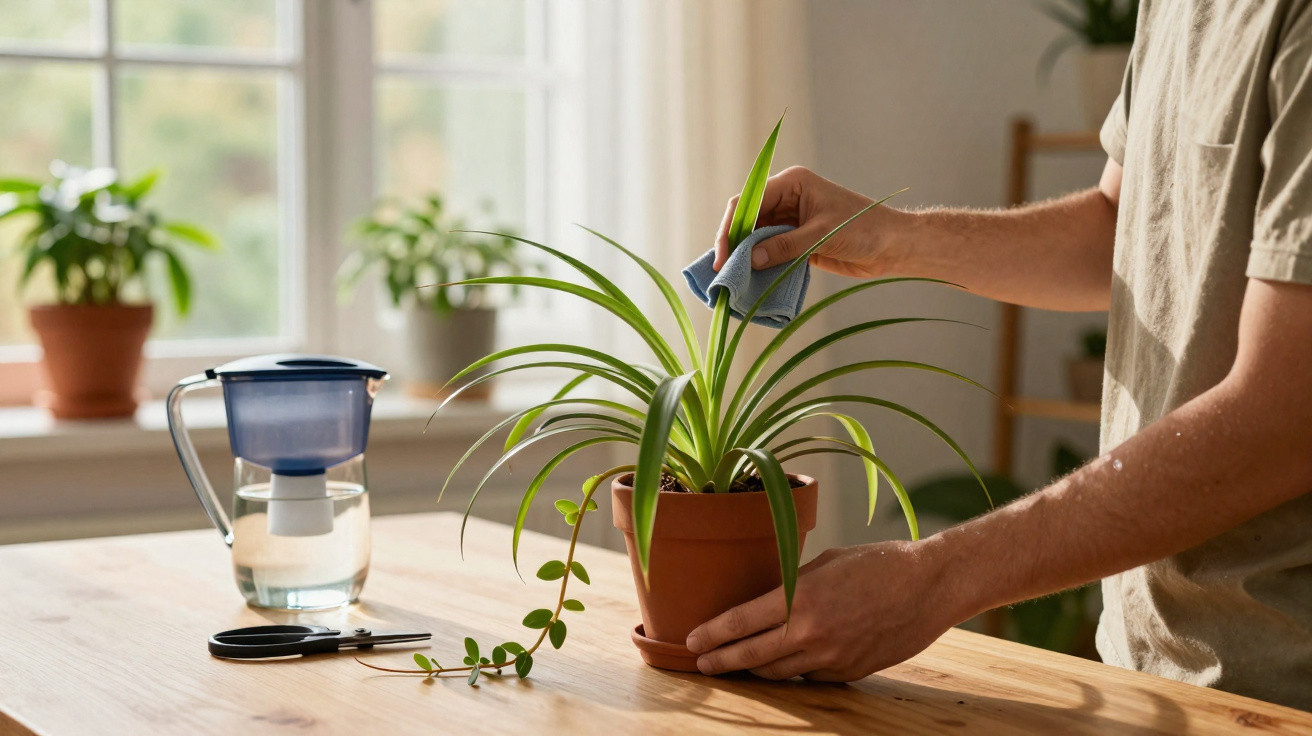
As the days brighten, the spider plant often shows, mercilessly, what winter has done to it - and this is the moment that sets it up for summer.
Greyed leaves, brown tips, limp, drooping shoots: spring is when the spider plant makes it obvious whether it has made it through the dark months in good shape. Put a few targeted jobs in the diary now and you’ll help Chlorophytum comosum fill the living room with fresh, dense green right through summer - instead of merely struggling along.
Why spring is the key season for the spider plant
From March onwards, the spider plant ramps its metabolism back up. Sap flow increases, new leaves push through, and the plant copes far better with strain. That window is exactly when you can tackle care tasks that would be stressful in winter: gentle pruning, moving it to a better spot, and giving it fresh compost.
At the same time, issues tend to stack up now. Stronger sun, dry air from heating, tired potting mix and rushed watering mistakes catch up quickly. Leaves yellow, edges dry out and whole shoots flop over. A brief spring check-up prevents a meltdown in July, when the flat heats up and the plant is running at full stretch.
"The spider plant responds incredibly quickly to good care - especially in spring, a small effort makes a huge difference to its summer foliage."
The 6 most important spring steps for a vigorous spider plant
Chlorophytum comosum doesn’t need an elaborate spa treatment. In most cases, half an hour of focused attention is more than enough. These six actions form the core of a sensible spring routine.
1. Remove dust from the leaves thoroughly
Over winter, a fine film of dust settles on the leaves. It doesn’t just look dull; it also reduces light intake and disrupts air exchange.
- Wipe each leaf with a soft cloth that’s only slightly damp
- Clean both the upper and underside - the underside is often overlooked
- Avoid leaf-shine products, which can clog the pores
Once cleaned, the plant looks noticeably fresher straight away, and photosynthesis can get going properly.
2. Trim brown tips and cut back dried leaves
Brown leaf tips are almost a hallmark of spider plants. They spoil the look, and they can also hinder growth if the damage keeps creeping further into the leaf.
- Remove completely dried leaves close to the base
- Cut brown tips off at an angle, roughly following the natural shape of the leaf
- Take off only truly dead tissue; don’t cut deep into healthy green areas
Afterwards the clump automatically appears fuller and neater, and fresh shoots stand out far better.
3. Water correctly: moist, not soaking
As temperatures rise, water demand increases - but waterlogging remains the roots’ biggest enemy. The trick is consistency, not drenching the pot.
"A finger in the compost is more reliable than any watering app: if the top layer feels dry, it’s time to water."
- Water as soon as the surface of the compost has dried
- After a few minutes, empty the saucer completely
- Offer smaller amounts more often rather than rare, heavy soakings
This keeps the lower compost lightly moist without leaving the roots sitting in water.
4. Improve water quality to limit brown edges
Many spider plants are sensitive to hard tap water. Limescale and chlorine encourage brown tips, especially when the plant is close to a radiator.
- Rainwater is ideal, provided it’s collected cleanly
- Otherwise, leave tap water to stand in a watering can for at least 24 hours
- Don’t use cold water - room temperature is gentler on the roots
If you pay attention to these details, you’ll often see within a few weeks that new leaves emerge noticeably healthier.
5. Start feeding gently
In winter there is little to no feeding, and by spring the nutrients in the compost are often depleted. At this point, Chlorophytum comosum benefits from a careful, modest boost.
- Use a liquid feed formulated for foliage plants
- Dilute it more than the bottle recommends
- Feed about once a month during the growing season
Too much feed does more harm than none at all: salt build-up in the compost leads back to brown edges and weakened roots.
6. Don’t skip a pest check
Mealybugs, spider mites and aphids love dry heated air and stressed plants. In spring they often show up around the leaf bases or on the undersides.
- Inspect the base of the clump and the undersides of leaves methodically
- Take cottony tufts, sticky patches or fine webbing seriously
- If infestation is light: rinse with lukewarm water and wipe with mild soapy water
Acting early spares the plant months of trouble and helps stop pests spreading to other houseplants.
Position, light and pot: how to make the spider plant a summer standout
The right spot: bright, but not blazing
In January, a windowsill above a radiator can look like a perfect home. By April, that same place can turn into a heat trap. Spider plants enjoy plenty of light, but direct midday sun can quickly scorch holes into the foliage.
- East- or west-facing windows with bright, indirect light are ideal
- At a south-facing window, move it 1–2 metres back or use a light curtain
- Signs of sun scorch: pale, straw-coloured patches that later become brown and dry
If you respond to these warnings and shift the plant slightly in time, you can prevent permanent leaf damage.
Spring root check and repotting
A spider plant happily fills a pot to the brim. That creates an impressive cushion of leaves, but sooner or later it restricts further growth. Spring is the best time to take a look at the root mass.
Warning signs that repotting is urgent:
- Roots are pushing out of the drainage hole
- When lifted, the whole root ball slides out like a brick
- Despite watering, the compost dries out extremely quickly
In most cases, the new pot only needs to be one size larger. Too much extra volume makes it easy to keep the compost permanently wet.
| Aspect | Recommendation for the spider plant |
|---|---|
| Pot size | Choose only slightly larger than the old pot |
| Compost | General houseplant compost mixed with a little sand or perlite |
| Drainage | Hole in the base of the pot; optional thin layer of expanded clay |
| Temperature | Consistently above 10 °C; ideal 18 to 24 °C |
When repotting, it’s worth checking closely: black, mushy roots indicate rot and should be removed cleanly before adding fresh compost.
Turning offsets into a small spider plant empire in spring
One of this species’ biggest strengths is that it relentlessly produces little plantlets on long, arching runners. In spring, these “babies” root particularly easily because the mother plant is in active growth.
- Pick strong offsets where tiny leaves are already visible
- Either cut them off and place into moist compost straight away
- Or pin the offset into a pot first, then separate it from the mother later
This quickly creates new pots for the bathroom or bedroom, or a small gift for someone else. It also takes pressure off the mother plant, so it puts less energy into endless runners and more into building denser foliage again.
What’s really behind brown leaf tips
Many owners immediately blame “too little water”. In reality, several factors are often working together:
- tap water that’s too hard and high in limescale
- dry air above a radiator
- overfed compost with salt deposits
- constant waterlogging in the saucer
Work through these points one by one and you’ll notice that new leaves emerge much cleaner, even if older leaves are already damaged. Old leaf damage won’t heal, but the plant can gradually replace it with fresh growth.
Spider plant as an easy-care air improver
Chlorophytum comosum has been regarded for decades as a straightforward, beginner-friendly houseplant. It forgives plenty of early mistakes, but it also signals problems clearly - which makes it ideal for learning watering rhythms, light needs and feeding timing.
Many people also value it as a natural air improver in homes and workplaces. Even though laboratory results from test chambers can’t be transferred one-to-one to every room, one thing holds true: a healthy, vigorous spider plant clump supports a more pleasant indoor feel, traps dust and brings visible life to corners that can otherwise seem sterile.
If you invest in cleaning, trimming, a steady watering routine, slight position tweaks, fresh compost and pest checks in spring, you’ll reap the reward in summer: a dense, cascading curtain of leaves that turns windowsills, shelves and sideboards into a small, robust jungle zone with very little extra effort.

Comments
No comments yet. Be the first to comment!
Leave a Comment