
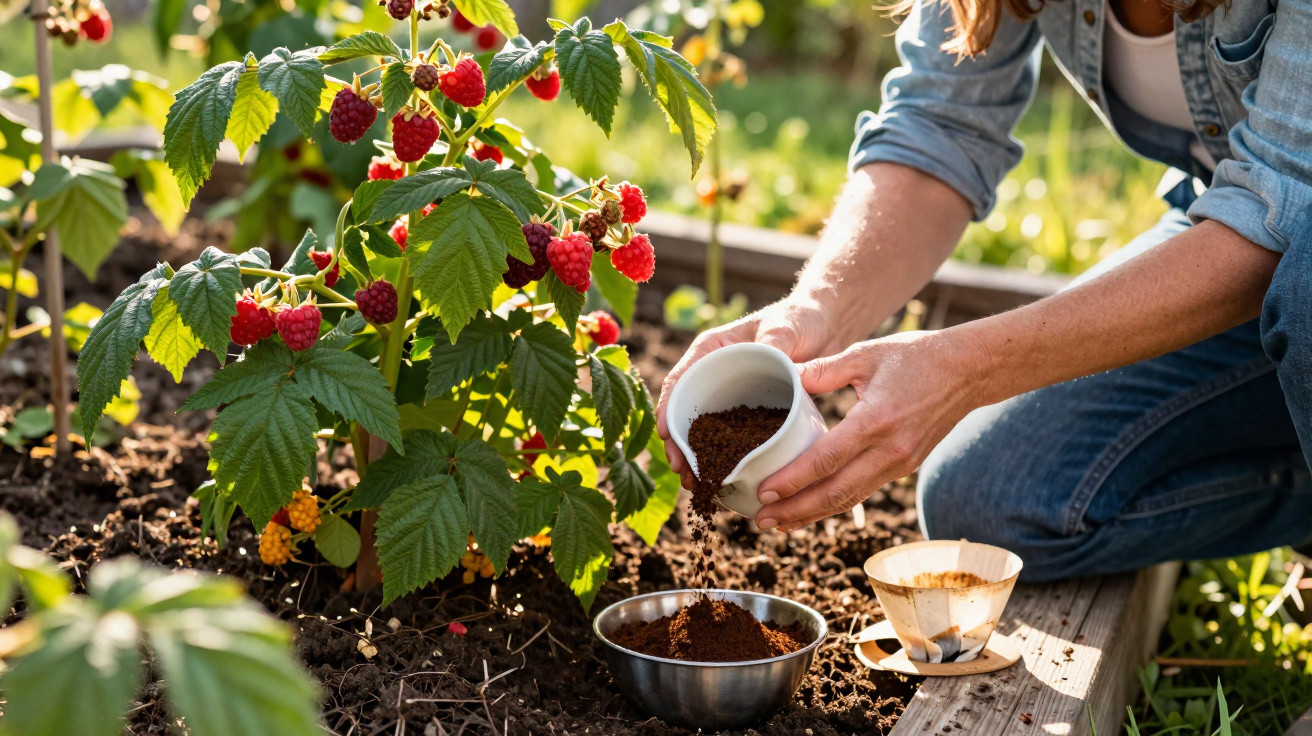
If you grow raspberries in the garden or in pots on a balcony, you’ll probably recognise the pattern: strong canes, rich green leaves-and then, right at the tips, only a small handful of fruit. Often the issue isn’t the variety at all, but tired soil and the wrong kind of spring care. One straightforward approach using everyday kitchen leftovers can help the plants put noticeably more energy into fruit rather than just foliage.
Why many raspberries grow vigorously but produce a poor crop
Raspberries are among the most popular nibble-as-you-go fruits for home growers. At the same time, they’re very sensitive to soil conditions. They do best in soil that is:
- slightly acidic (pH tending towards the lower end of neutral)
- loose and well aerated
- evenly moist, but never waterlogged
- nutrient-rich, but not over-fertilised
If even one of these factors is out, the plant will still grow, but the harvest often disappoints. The typical sight is this: long, sturdy canes, plenty of leaf growth, yet only a few berries that stay small or dry up. In particular, beds that haven’t had any targeted nutrient inputs for years are frequently depleted.
The key window starts in early spring. This is when the plant pushes new growth and sets the basis for flower formation. Support the soil intelligently at this point, and you directly influence how many raspberries you’ll pick in summer.
"A lively, slightly acidic and well-nourished soil is the most important ally for raspberry bushes loaded with fruit."
The cup method: coffee grounds as a natural fertiliser
This simple trick is widely shared among hobby gardeners and uses something many households generate every day: dried coffee grounds. What would otherwise be thrown away can be surprisingly effective as a soil improver for raspberries.
Coffee grounds contain, among other things:
- nitrogen – for strong growth and leaf formation
- phosphorus – supports flowering and fruit set
- potassium – strengthens plant tissue and improves resilience
- magnesium and trace elements – important for metabolism and healthy green leaves
There’s another benefit: coffee grounds slightly lower the pH. That suits raspberries well. As the grounds break down, their organic material encourages microorganisms, helping the soil become looser with a more stable structure. Moisture is held more effectively, yet waterlogging is less likely because the soil becomes finer and more crumbly.
How to do the cup trick step by step
The cup method is mainly about getting the quantity right. Many people simply tip coffee grounds in a thick layer around the plant-this can do more harm than good. Using a standard cup helps you stick to an appropriate dose.
Preparing coffee grounds properly
Fresh coffee grounds are still warm and damp, which makes them prone to mould. So the rule is:
- Let the coffee grounds cool completely after brewing.
- Spread them out thinly on a plate, a tray, or newspaper.
- Leave to dry for one to two days in an airy, dry place.
Only once the grounds are genuinely dry should they go on the plants. This helps prevent unwanted fungal growth.
Dosing with a cup in the bed
For planted-out, well-established raspberry bushes, the following rule of thumb works well:
- Per application: roughly one cup of dry coffee grounds for one to two mature plants
- Layer thickness: around 1 cm, never thicker
- Distance: don’t tip it right against the canes-spread it around the root zone instead
Work the coffee grounds in very lightly with your fingers or a small hand rake, just into the top layer of soil. Then water in, so the nutrients move into the root area.
"Regular small amounts do far more than one big load all at once."
How often you should use the cup
The critical period runs from spring into early summer. During this phase, raspberries lay the groundwork for the crop. A proven schedule:
- every two to three weeks in spring

Comments
No comments yet. Be the first to comment!
Leave a Comment