
Anyone who waits each year for a riot of blooms and ends up staring at a few tired heads is usually not doing too little, but doing the wrong thing - and, above all, doing it at the wrong time. British gardening expert Monty Don swears by a simple March routine that most people overlook, yet it reliably brings him more flowers.
Why March determines your hydrangea flowering
Hydrangeas are often described as easy-going shrubs that will still grow happily in partial shade. Even so, plenty of plants look surprisingly sparse in summer. The culprit is frequently a misunderstanding: tidying up gets confused with proper care.
In particular, the widely grown mophead or bigleaf hydrangeas (Hydrangea macrophylla) set their flowers on what gardeners call “old wood”. In other words, the buds for next summer form the previous year and sit on the stems all winter.
If you enthusiastically cut off everything that has finished in late winter, you often remove precisely those buds. The plant still produces fresh growth and appears healthy - but the flowers never arrive.
“The crucial point isn’t what you cut, but when and where you put the secateurs.”
That’s why Monty Don advises leaving the faded flowerheads on the plant throughout winter. They give the tender buds underneath a bit of protection from frost and wind. Only in March, once the harshest cold has passed and the buds are visibly swelling, does he start pruning.
How Monty Don prunes in March - step by step
The key difference is a very exact cutting point. This is not about “neatening” the hydrangea; it’s about saving as many flower buds as possible.
The correct cutting point beneath the flower
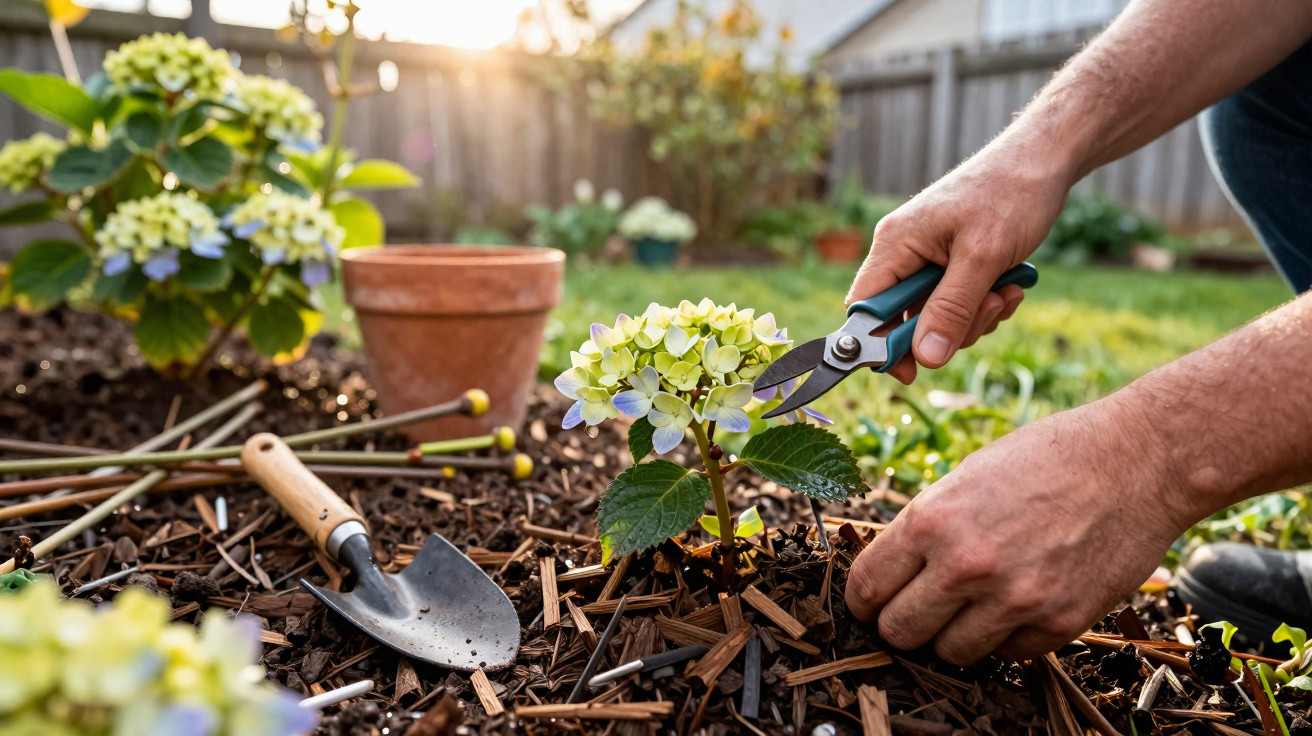
Monty Don recommends taking each old flower back only slightly:
“Make the cut directly above the top strong pair of buds just below the dried flower.”
This removes the dead flower and the often slightly frost-nipped tip, while keeping the two fat buds intact. Those are the buds that produce this year’s blooms.
- In March, choose a mild day with no frost.
- On each stem, locate the old, dried flowerhead.
- Just below it, identify the first strong pair of buds (two buds opposite each other).
- Using sharp secateurs, cut a few millimetres above that bud pair.
For many hydrangeas, that’s genuinely all that’s required. Where some gardeners cut away half the shrub, Monty Don limits himself to a handful of accurate snips.
When you can prune more firmly
Beyond removing the spent flowerheads, March is mainly about keeping the shrub in good condition:
- remove completely dead stems close to the ground
- cut out very thin, weak growth
- take out a few older, tired stems to make room for younger ones
For true renovation - meaning a noticeably harder cutback - Monty Don waits until straight after flowering, in late summer. By then, the buds for the following year have not yet formed, so the plant can rebuild without sacrificing next year’s display.
The underestimated trick: mulching for stronger buds
Pruning is only half the story. What happens at soil level in winter and very early spring matters just as much. For years, Monty Don has relied on a straightforward practice: a generous layer of mulch around the base of the shrubs.
He uses well-rotted organic matter, such as:
- mature garden compost
- mushroom compost
- bark mulch, ideally pine bark for hydrangeas
“A mulch layer of around 5 to 10 centimetres protects buds, holds moisture and slowly feeds the plant with nutrients.”
Apply the mulch on a cool but frost-free day in January or early March. The soil should not be frozen or completely waterlogged. Important: keep the crown clear - the immediate area around the main stems should be left free of mulch. If mulch is piled right against the base, rot and frost damage to young buds become more likely.
What mulch actually does
A mulch layer handles several jobs at once:
- Frost protection: the ground doesn’t freeze as deeply, so fine roots and buds suffer less damage.
- More even moisture: the soil dries out more slowly in spring, reducing plant stress.
- Slow nutrient release: as it breaks down, the mulch feeds the hydrangea right where it needs it.
- Fewer weeds: competition for water and nutrients drops noticeably.
Monty Don even suggests it’s better to mulch one part of the garden properly and thickly than to spread a paper-thin layer everywhere that achieves very little.
Common mistakes that cost you flowers
Many “care” routines do more harm than good. Three repeat offenders show up in gardens again and again:
- Pruning too early: hydrangeas “tidied up” in December or January often lose most of their buds.
- Cutting back hard into old wood: shortening shrubs drastically can easily remove the stems carrying the flower buds.
- Fresh mulch right against the stems: unrotted bark or fresh grass clippings are often heaped at the base, where they damage buds and bark.
“That’s why many hydrangeas look healthy but barely flower - the cause goes back months, to the secateurs and the wheelbarrow.”
How different hydrangea types respond
To make the March approach work, it helps to separate the most common garden groups:
| Hydrangea type | Example | Flowers on | Pruning strategy |
|---|---|---|---|
| Mophead/bigleaf hydrangea | Hydrangea macrophylla | old wood | only remove spent blooms above the bud pair; major cuts after flowering |
| Smooth hydrangea | Hydrangea arborescens, e.g. ‘Annabelle’ | new wood | a stronger cut in late winter is possible; it regrows and still flowers heavily |
| Panicle hydrangea | Hydrangea paniculata | mostly new wood | prune moderately to hard in late winter to control shape and size |
The Monty Don trick described here is aimed primarily at mophead hydrangeas - the ones that dominate so many front gardens. If you’re unsure which type you have, it’s safer to leave more old wood in place until summer reveals how the plant flowers.
Practical examples for your own garden
If you want to test the idea, it’s easy to compare in your own border: care for one shrub using Monty Don’s method and treat a second as you normally would. After just one summer, you’ll usually see a difference in the number of flowerheads - and often in the size of the individual blooms as well.
Many hobby gardeners report that the look of the bed shifts noticeably after a single year: instead of lots of long, leafy shoots carrying only a few heads, they get more compact, sturdier stems topped with densely packed flower balls.
Other factors for strong hydrangea blooms
Alongside pruning and mulch, a few broader conditions also play a part:
- Water: in summer, hydrangeas need consistently moist soil. Short dry spells quickly cause drooping leaves and smaller blooms.
- Position: bright partial shade is ideal, such as the north or east side of a house. Harsh midday sun puts the plants under stress.
- Fertiliser: a light, balanced general fertiliser in spring is often enough. Too much nitrogen pushes leafy growth at the expense of flowers.
If you get those basics right and make the March routine a habit, your hydrangeas tend to perform more reliably year after year. In smaller gardens, every extra bloom counts - and it often appears simply because the cut was made a few centimetres higher, at exactly the right moment.
Comments
No comments yet. Be the first to comment!
Leave a Comment