
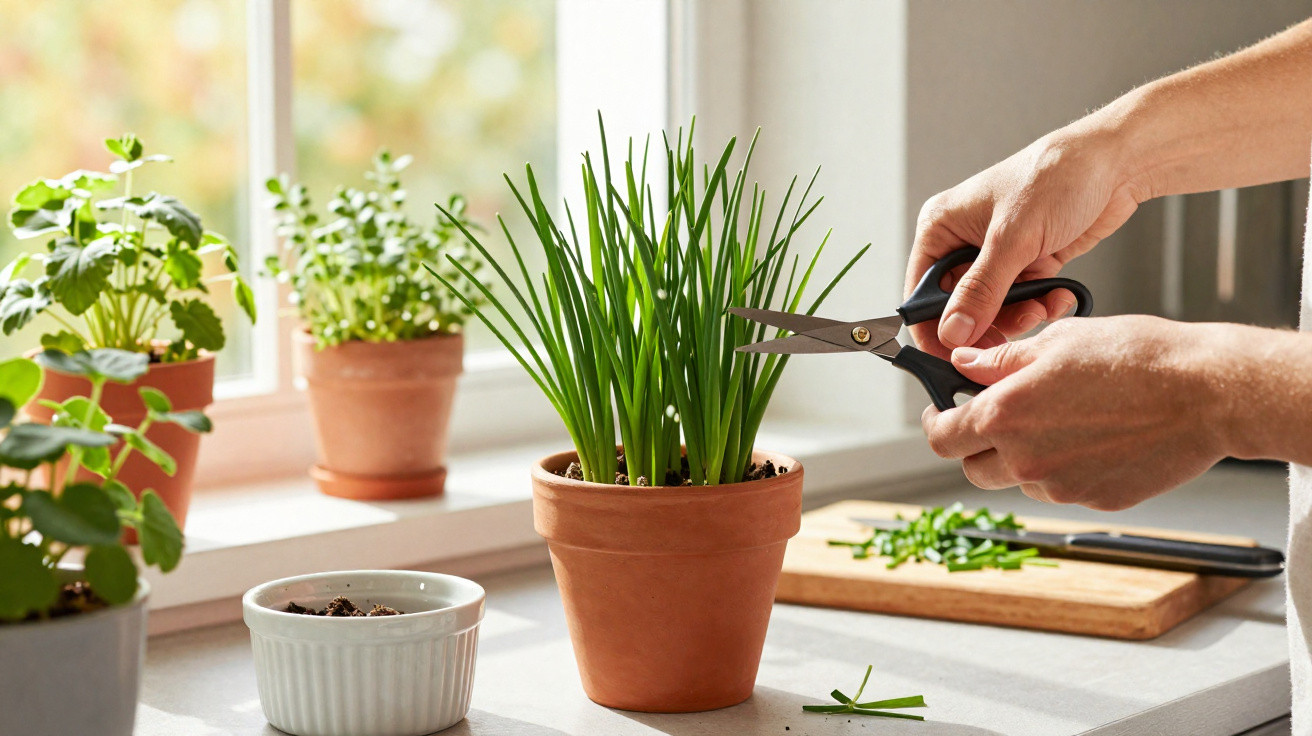
You step outside to snip “just a little chive” for your omelette - and stop dead. The formerly perky green tuft in its pot now looks weary: hollowed out, flattened, like hair ruined by a downpour. A few tips are turning yellow; other stems are splaying in every direction. You harvest around the worst of it, take a small handful to the frying pan, and think, “Well… that’s probably the last of it for this year.”
Then you flick past a photo of a neighbour’s chive clump, lush and glossy like it belongs in an herb advert, and you start to suspect they’ve found some secret feed. In reality, the fix is far more ordinary - and it’s probably in your kitchen drawer. A pair of scissors, plus the nerve to use them properly.
Why your chives give up on you before summer ends
If potted chives and chives in beds could leave feedback, the top message would be: “Please, cut us properly.” When chives are left to their own devices, they soon get leggy, flower, flop over, and become woody at the base. The leaves lose their crisp bite, and what used to be a juicy garnish starts to resemble tired lawn clippings.
What looks like a plant “getting old” is very often just a plant that hasn’t been harvested in the right way. Chives behave a bit like hair: if you only ever neaten the ends, you never trigger that thick, fresh regrowth.
Imagine this. On one side of the balcony sits a terracotta pot of chives that gets clipped every two or three days - always a handful, always from the top. On the other side is the same variety in the same sort of soil, but it’s cut right back two or three times over the season.
By July, you’d swear they were different plants. The first pot is full of long, hollow stems that yellow and topple. The second stays compact and bright green, constantly sending up new leaves that actually taste of something. Same chives, different scissors story.
Chives are often described as a “cut and come again” herb, but there’s a crucial detail hiding in that phrase. The plant banks its energy in the bulb and the lower stem. If you never properly remove the upper growth, it puts its effort into flowers and seed rather than fresh foliage. Those purple pompons feel like a win - yet they often coincide with a drop in flavour.
Cutting back hard and doing it regularly tells the plant the opposite: “Give me leaves.” In return, you get a new flush that’s softer, more aromatic, and much less likely to collapse.
The easy cutting method that keeps chives fresh and productive
The most straightforward routine can feel slightly drastic the first time you try it. Let the chives reach roughly 15–20 cm tall, then use clean kitchen scissors to cut the entire clump back to about 3–4 cm above the soil. Yes - all of it. One decisive haircut.
Keep a small green “collar” so you’re not shaving it right down to the soil surface. Give it a light watering afterwards. Within a week or two, you’ll usually see a new, dense thicket of shoots returning with more vigour than the tired stems you removed.
Most people do the reverse at home: they nibble. One stem for scrambled eggs, two for a salad, a few more for sour cream. The plant ends up permanently half-harvested and never genuinely renewed. Older leaves shade the base, the centre turns tough, and the whole clump gradually peters out.
We’ve all hit that point where you assume you’ve “got no green thumb”, when in fact your chives are simply waiting for a proper reset. And let’s be honest: hardly anyone manages this every day. But even two or three firm cut-backs across the season can dramatically improve the plant’s condition.
Cutting chives deeply is not an act of punishment, it’s an act of trust. You’re trusting the plant’s natural urge to rebound, instead of clinging to every old leaf “just in case”.
- Start with courage
Make your first big cut in spring while the tuft is thriving, rather than waiting until it’s worn out. - Protect the base
Always leave a short ring of green so the plant can photosynthesise and recover. - Time your harvests
Leave 3–5 weeks between “haircuts”, depending on growth rate and the weather. - Say no to constant tip-snipping
Treat light picking as something you do between major cuts, not as your only approach. - Remove flowers early
Pinch out flower buds if you want more leaves, or accept fewer leaves in exchange for those purple globes.
Living with chives like a quiet, generous roommate
Once you begin cutting chives this way, the whole dynamic shifts. Instead of treating the plant as a delicate ornament, you start handling it for what it is: a hardy, generous perennial that actually benefits from a bit of firmness. The pot by the kitchen door becomes part of the weekly routine - almost a small pre-cooking ritual.
You cut, you water, you give it a few days - and the green returns. It becomes a gentle, ongoing conversation between your scissors and the soil. You’re not “using up” the plant, you’re inviting it to start again.
| Key point | Detail | Value for the reader |
|---|---|---|
| Deep, regular cuts | Cut chives to 3–4 cm above soil, 2–4 times per season | Denser, fresher foliage that lasts longer through the year |
| Control flowering | Remove buds if you want leaves, or accept fewer leaves for more flowers | Better flavour and more usable herbs in the kitchen |
| Gentle aftercare | Water after cutting, add a little compost once or twice a year | Stronger plants, less yellowing, fewer replacements to buy |
FAQ:
- How often should I cut my chives back completely? Two to four times per growing season is enough for most gardens. Wait until the clump is tall and full, then give it a “haircut” to 3–4 cm.
- Can I eat the chive leaves after flowering? Yes, but they’re usually tougher and less flavorful. If you mainly want leaves, remove flower buds early or cut the whole plant back to restart growth.
- Will cutting chives low kill the plant? No, as long as you leave a short ring of green and the bulbs are healthy. Chives are surprisingly resilient and bounce back quickly.
- Should I cut chives with scissors or pinch them with my fingers? Scissors or a small knife give a cleaner cut and stress the plant less. Finger-pinching tends to crush the stems.
- What about indoor chives on the windowsill? The same rule applies: fewer small snips, more occasional deep cuts. Just avoid cutting too low if the plant is weak or poorly lit.

Comments
No comments yet. Be the first to comment!
Leave a Comment