
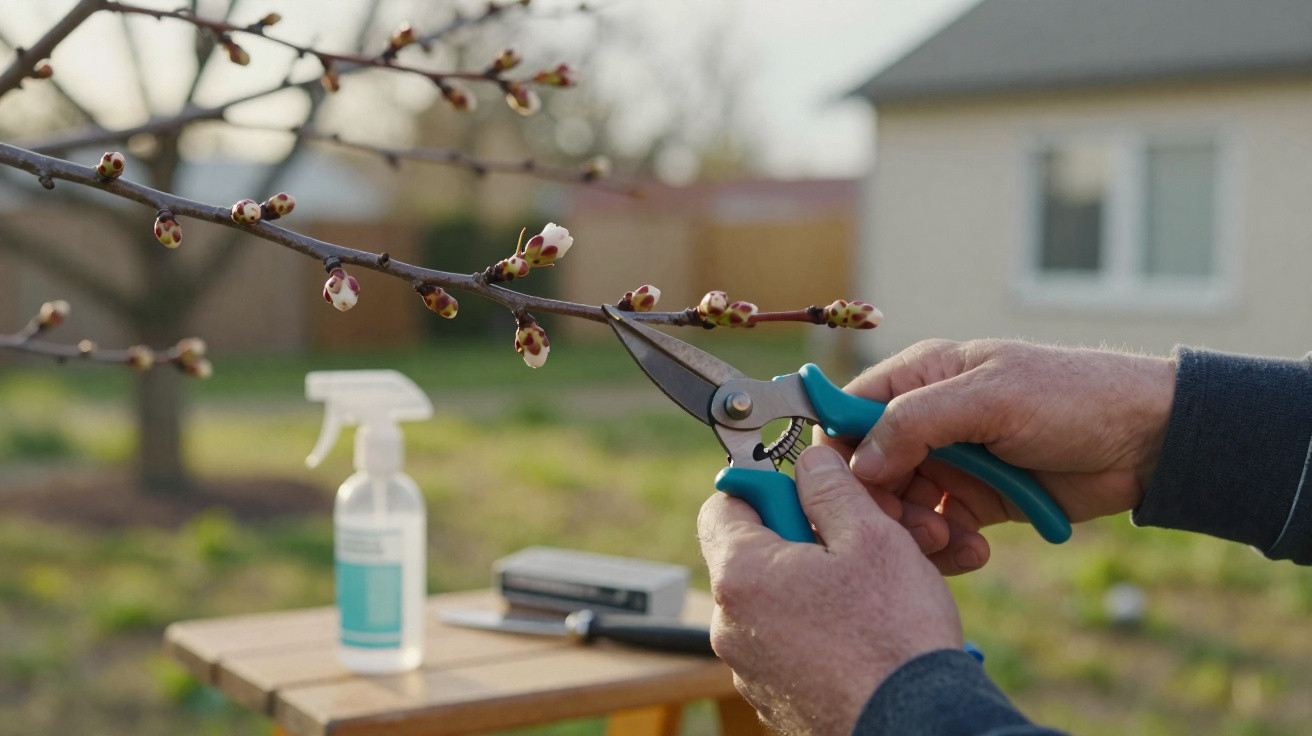
If, come spring, you simply hope that “nature will sort it out”, you throw away most of a cherry tree’s potential. Older gardeners in particular relied on a straightforward, free trick that can turn a half-hearted tree into a proper cherry-producing machine. The clever part: it works without fertiliser, pesticides or any specialist products from the garden centre - but only if you hit a very narrow timing window.
Why the right moment decides your cherry harvest
The secret isn’t the priciest feed; it’s the date on the calendar. A cherry tree reacts strongly to when you prune it - not just how you do it.
The ideal phase: just before the buds really get going
The best moment for the key intervention is right at the tail end of winter, when spring is just around the corner. The sap is starting to rise, but leaves and blossom have not appeared yet. At that point, your cherry tree has two major advantages:
- The crown is still see-through, so you can read the whole structure.
- Cuts close quickly, because the rising sap supports the healing process.
Prune too late - once the tree is fully active and putting on strong new growth - and you drain it of energy for no good reason. The result can be lots of leaf growth but few flowers, and therefore very few cherries.
“The crucial spring move on a cherry tree happens just before bud break - not once it’s already standing there in a green outfit.”
Before any cut: “read” the tree like a doctor
Before you reach for the secateurs, take a moment to observe. Stand back from the trunk, view the crown from every side, and also look up through it from underneath. Ask yourself:
- Does light reach the centre of the crown?
- Is there a chaotic tangle inside?
- Can you spot branches crossing or rubbing?
If the inner area looks like an impenetrable knot, it’s a clear sign: sunlight can’t reach the inner fruiting wood. Then many cherries stay small and pale - or fail to develop at all. Dense growth also traps moisture, creating ideal conditions for fungal disease.
The old forgotten trick: thin the crown instead of “adding more fertiliser”
The real “secret move” is surprisingly simple: older gardeners relentlessly removed anything that clogged the inside of the tree or stole its energy. The aim is to direct light, air and sap to the right places.
Crossing and rubbing branches: quiet damage with big consequences
Many mature cherry trees contain branches that touch, overlap or compete for the same space. In the wind they chafe against each other, the bark splits, and small wounds form. That’s exactly where fungi and bacteria get in.
A practical rule of thumb is: if two branches are in each other’s way, only one stays. The other goes. Before you cut, decide:
- Which branch sits more naturally within the crown?
- Which one lets in more light?
- Which is healthier and better attached?
Over time, this creates an airy, tidy structure where cherries get both space and sunshine.
Removing water shoots: why these “power branches” don’t deliver cherries
Almost every cherry tree produces long, steep shoots that rocket upwards from the trunk or from thick scaffold limbs. Many hobby gardeners like them because they look like “vigorous growth”. That’s the mistake.
“These steep water shoots drink up huge amounts of sap - but give you virtually no fruit in return.”
These water shoots rarely flower. They divert energy that should be going into flower buds and, later, cherries. So the rule is:
- Remove these shoots right at the base, as cleanly as possible at the point of origin.
- Don’t leave them behind hoping “they’ll be useful later” - they almost never are.
This one step pushes the tree’s strength back into the fruit-bearing areas. That’s what older gardeners meant when they said: “The tree has to be able to breathe, otherwise it won’t crop.”
Prune like a professional: the right tools, the right cut
When you prune a cherry tree, you are effectively creating an open wound. Clean tools and deliberate cuts reduce stress and help prevent disease.
Tools like a surgeon’s: sharp and clean
Ideally, don’t just grab whatever is rusting in the shed - prepare properly. For a medium-sized cherry tree you will usually need:
- sharp, clean secateurs for thinner branches,
- a pruning saw or a pole pruner for thicker sections,
- alcohol (70–90 percent) to disinfect blades between trees.
The reason is straightforward: fungal spores, bacteria and viruses cling to blades. If you move from tree to tree without cleaning, you spread disease like a syringe.
The perfect cut: just above an outward-facing bud
Cherry trees can be sensitive to rough cuts or cuts in the wrong place. A few basic rules make a big difference:
- Cut a few millimetres above a bud.
- Choose a bud that points outwards so the new shoot grows away from the centre of the crown.
- Angle the cut slightly so rainwater can run off.
That keeps the bud drier, reduces the risk of rot, and the new growth naturally helps maintain an open, well-ventilated crown. On thicker branches, leave a small safety margin so you don’t end up with a long stub that dies back later and becomes an entry point for decay.
What a well-treated cherry tree looks like after a spring prune
After a firm but not drastic prune, the tree will look slimmer at first glance. Look more closely and you’ll see a clear pattern.
Signs of a successful cherry tree crown
- From the outside, light reaches right into the middle of the crown.
- Hardly any branches touch or rub against one another.
- The steep, upright water shoots have largely been removed.
- Larger wounds are neatly sawn, with no ragged edges.
Many gardeners chip the prunings and spread them as mulch beneath the tree. This returns nutrients on-site, without buying additional fertiliser.
“Less wood, more light, clear structure - that exact mix brings plump, sweet cherries in summer instead of disappointed looks at empty branches.”
What changes inside the tree over the coming months
After pruning, sap flow concentrates into the remaining, well-lit shoots. More flower buds form there, which later carry blossom. With improved airflow, the crown dries much faster after rain, and fungal problems reduce noticeably.
In summer, you’ll usually notice the benefit in two ways: there are more cherries on the tree, and they are bigger, richer in colour and more aromatic, because light and air can reach every fruit.
Common questions: mistakes, risks and useful extras
Can you prune a cherry tree “too much”?
Yes. If you remove more than about a quarter of the crown in one go, you put the tree under unnecessary stress. A typical response is even stronger water-shoot growth the following year as it tries to compensate for the loss. It’s better to correct the structure over 2–3 years than to do everything in one session.
When does a second prune make sense?
Many experienced gardeners do a light summer prune after harvesting. That’s when you remove any new water shoots and tidy up minor issues. In summer the tree responds more calmly, puts on less aggressive regrowth, and wounds close well in warm weather.
Practical extras around the trunk
To get the most from a spring prune, it’s worth checking the ground around the tree:
- A thin layer of mulch helps stop the soil drying out.
- Keeping a grass-free circle around the trunk reduces competition for water.
- A modest dressing of mature compost in spring supports growth.
If you have children or pets in the garden, it’s an added benefit to avoid chemical products altogether. A well-pruned, well-ventilated cherry tree is naturally more robust and needs far less “medicine” from a bottle.
With a little practice, the annual spring move on a cherry tree becomes a set ritual: a quick inspection, a few targeted cuts - and in summer the red fruits hang thickly. Many older gardeners still swear by it and, year after year, fill their jars with homemade cherry jam, simply because they got that one moment in March exactly right.




Comments
No comments yet. Be the first to comment!
Leave a Comment