
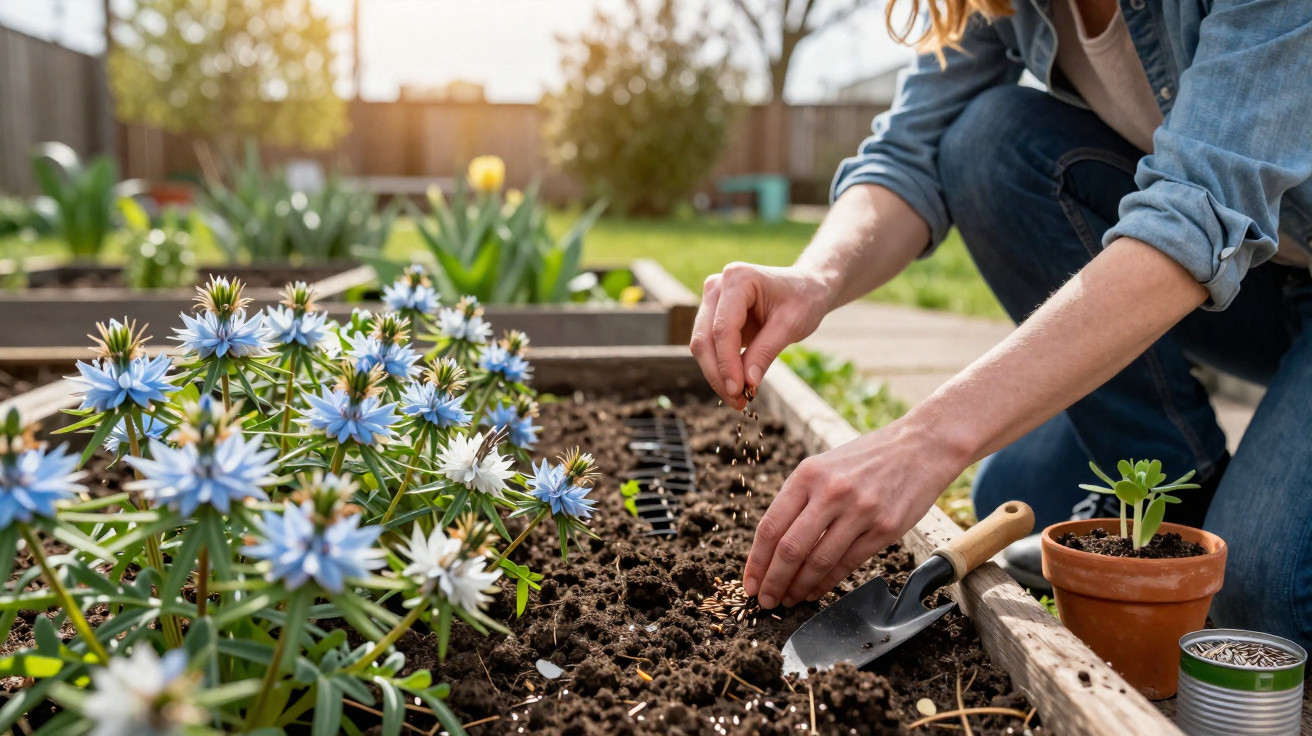
Plenty of amateur gardeners look at bare beds in March and feel deflated. You might be craving a bit of colour, but the thought of constant watering, feeding and weeding can be enough to put you off. That’s exactly where a surprisingly undemanding summer flower earns its place: it more or less gets on with the job and keeps flowering from June well into late summer.
A summer flower that fills beds almost by itself
The plant in question is love-in-a-mist (Nigella damascena). With very little input, this delicate, slightly dreamy-looking flower creates a natural, gently wild feel in the garden. Its fine, thread-like foliage forms a green haze, from which star-shaped blooms in blue, white or soft pink appear.
It typically reaches around 40 to 60 centimetres in height, making it a good fit for herbaceous borders, cottage gardens, front gardens, or larger pots on a balcony or terrace. If you sow in March, you’ll usually see the first flowers from mid-June-and you can often enjoy them until late August, and in kind weather even into September.
With a simple sowing in March, you lay the foundation for a whole summer of flowers – without daily maintenance.
This is exactly why beginners love it: it’s quick to grow, isn’t fussy about soil, and it forgives the odd small mistake. Many people say they started by sowing just a small corner-only to find, a few weeks later, a soft blue veil of flowers where there was almost nothing before.
Why March is the ideal time
Love-in-a-mist is one of those tough, annual summer flowers that uses the cooler conditions of early spring to get moving-once the ground is no longer frozen. For that reason, early to mid-March is considered the sweet spot in many areas.
- The soil is waking up: it’s no longer ice-cold, so germination gets going reliably.
- Less competition: beds are still fairly empty, and weeds haven’t taken over yet.
- Longer flowering display: sowing early can noticeably extend the flowering period.
In milder parts of the country, experienced gardeners sometimes begin as early as late February, provided no hard frosts are forecast. In colder locations where late frosts are common, it can be better to wait until late March or even early April. The plants don’t mind cool weather, but they don’t appreciate sudden, sharp night frosts.
Step by step: how to sow in March
Sowing love-in-a-mist is one of the simplest spring jobs-no seed trays, special compost or greenhouse required.
Choosing the right spot
A sunny position is best. It will cope with a little partial shade during the day, but the more light it gets, the more generously it will flower. The soil should be:
- loose and free-draining,
- not waterlogged for long periods,
- on the lean to average side rather than heavily fed.
If your soil is heavy and clay-based, lighten it with sand, fine grit or well-rotted compost. For containers, a good-quality potting compost that isn’t overly rich is ideal.
Preparing the soil – done in minutes
A brief bit of prep before you sow makes a big difference:
- Clear the area thoroughly of weeds.
- Loosen the soil with a rake or hand trowel and break up large clods.
- If the soil is very poor, work in a little compost.
It doesn’t need to be perfect-what matters is a fine, crumbly surface so the tiny seeds can make contact with the soil.
Sowing and covering the seed correctly
Next, scatter the seed thinly over the prepared patch. There’s no need for a ruler-straight line or a seed tape-just avoid sowing too densely.
Afterwards:
- cover the seed with only a few millimetres of loose soil or fine compost,
- press the surface down gently (with your palm or a board),
- water using a fine spray so the seed isn’t washed away.
If conditions are right, the first seedlings often show within one to two weeks.
Thinning properly: the secret to dense, not overgrown, beds
A common mistake is scattering far too much seed. It can look promising at first, but later it tends to produce tall, thin plants that compete with one another for light and nutrients.
After germination, leave roughly 20 to 25 centimetres between plants – this produces sturdy stems and richly flowering clumps.
Once the young plants have formed a few true leaves, do the following:
- gently pull out overcrowded seedlings, or snip them off at soil level with scissors,
- keep only the strongest plants,
- in larger beds, don’t aim for a rigid pattern-a slightly irregular spacing looks more natural.
If you want particularly large, individual-looking plants, you can increase spacing to 30 centimetres. For a looser “flower haze”, 20 centimetres is perfectly sufficient.
Keeping love-in-a-mist looking good all summer
Once established, it asks very little of you. That low-effort payoff is a big part of the appeal: borders look lively without every weekend being swallowed by jobs.
Watering and day-to-day care
In normal weather, rainfall is usually enough. Only during extended dry spells is it worth watering deeply. Regular light sprinkling isn’t necessary-roots cope remarkably well if the soil is allowed to dry a bit between waterings.
Feeding is generally unnecessary in beds, especially if you’ve mixed in some compost. Too many nutrients tend to produce lush, floppier growth with fewer flowers.
Removing spent flowers for continuous buds
If you want the longest possible flowering period, remove faded flowerheads regularly. Pinch them off with your fingers or use small scissors-nothing more complicated than that.
The more consistently you remove spent blooms, the longer the plant keeps producing new buds – often right into late summer.
A nice side benefit is that the bed looks tidier straight away, even though the plant itself suits a more natural, slightly untamed style.
Perfect for bouquets and for “self-seeding” gardens
Love-in-a-mist has delicate stems that work far better in a vase than you might expect. When freshly cut, it often lasts up to ten days, especially in cooler rooms and with the water changed regularly.
- For bouquets, cut in the morning.
- Stand stems straight into water.
- Pair with other summer flowers such as cosmos, baby’s breath or sweet peas.
Things get particularly interesting towards late summer: the flowers form decorative, balloon-like seed pods that also dry well for arrangements and dried bouquets. If you leave some pods on the plant, you’ll get what may be the biggest bonus of all.
As the pods ripen, they split open and drop seed into the soil. Next spring, new seedlings often appear-frequently in the very spots where the parent plants grew. Over time, this creates a relaxed, self-renewing drift of flowers.
How to combine it well – and what to avoid
Love-in-a-mist looks especially strong in wildlife-friendly, naturalistic planting. Mixed with hardy perennials and other annuals, it helps create a vibrant area that keeps offering colour.
Good companions include:
- catmint and sage for pollinators and bold colour,
- lavender for scent and structure,
- cosmos and marigolds for an easy, cheerful mix,
- grasses such as fountain grass for movement in the breeze.
Less suitable are very shady, permanently damp corners, or cramped pots without a drainage layer. In those conditions, the plant can suffer from root rot and is more likely to flop.
If you have pets or small children, it’s worth noting: like many ornamental plants, love-in-a-mist isn’t something to snack on. The striking seed pods invite handling, but they are not intended for eating.
For anyone who doesn’t want complicated watering schedules or pricey specialist feeds, this flower is a brilliant way to get started with summer gardening: one afternoon in March, a handful of simple steps-and months later the garden can look as though a professional has been in.
Comments
No comments yet. Be the first to comment!
Leave a Comment