
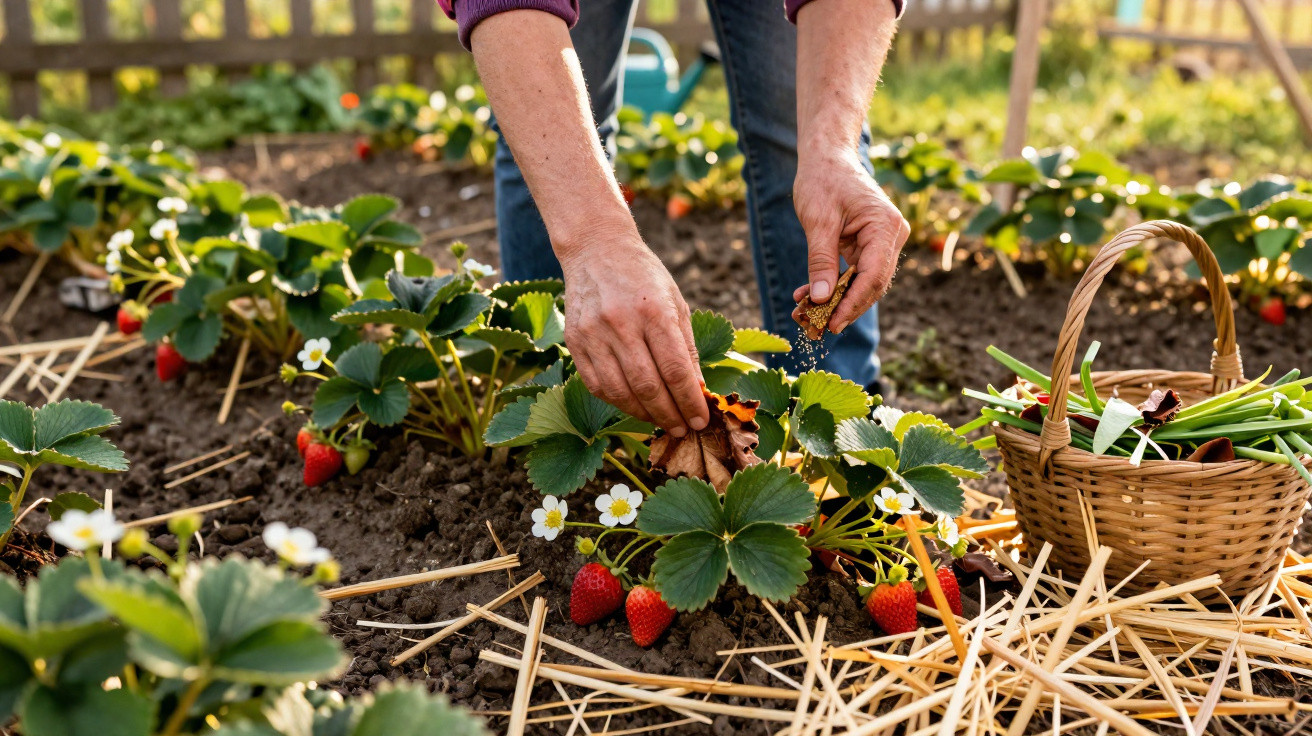
When strawberry plants wake up in April, it quietly determines how full your bowls will be in summer - or whether you end up picking only a few sad berries.
In the veg patch, April can still feel like a holding pattern: cool nights, mild days, and soil that’s heavy and damp. Yet this is exactly when the groundwork for a genuinely strong strawberry crop is laid. Get three simple jobs in the wrong order and you hold the plants back. Do them in the right sequence and you’re rewarded with noticeably more fruit, larger berries, and better sweetness.
Why April is the month that decides your strawberries
April is when strawberries really get moving. Sap flow increases, roots push fresh fine roots into the soil, days lengthen, and the plant builds more leaf growth. Anything you do now has an immediate effect - for better or for worse.
A common mistake at this stage is reaching for straw or mulch too early. The intention is sensible: protection and extra warmth. In practice, the opposite often happens: the soil stays colder for longer, moisture gets trapped, and the plant’s crown area remains clammy. That slows growth and encourages fungal problems, which thrive on old leaves and wet ground.
If you work with the plant’s natural rhythm rather than against it, you give strawberries what they need most at this sensitive point: air, light, and nutrients - and only then a protective blanket of mulch.
"The formula for high-yield strawberries in April is: tidy first, feed second, cover last."
The three crucial steps for more strawberries
The idea is straightforward, but it’s surprising how often people do it back to front. The order is the real lever:
- Clean the plants thoroughly
- Clear weeds and apply fertiliser with purpose
- Only then mulch and protect
Stick to this sequence and the nutrients get to where they’re meant to go, while the plants head into flowering healthy and without unnecessary stress.
Step 1: remove old leaves - get rid of disease hotspots
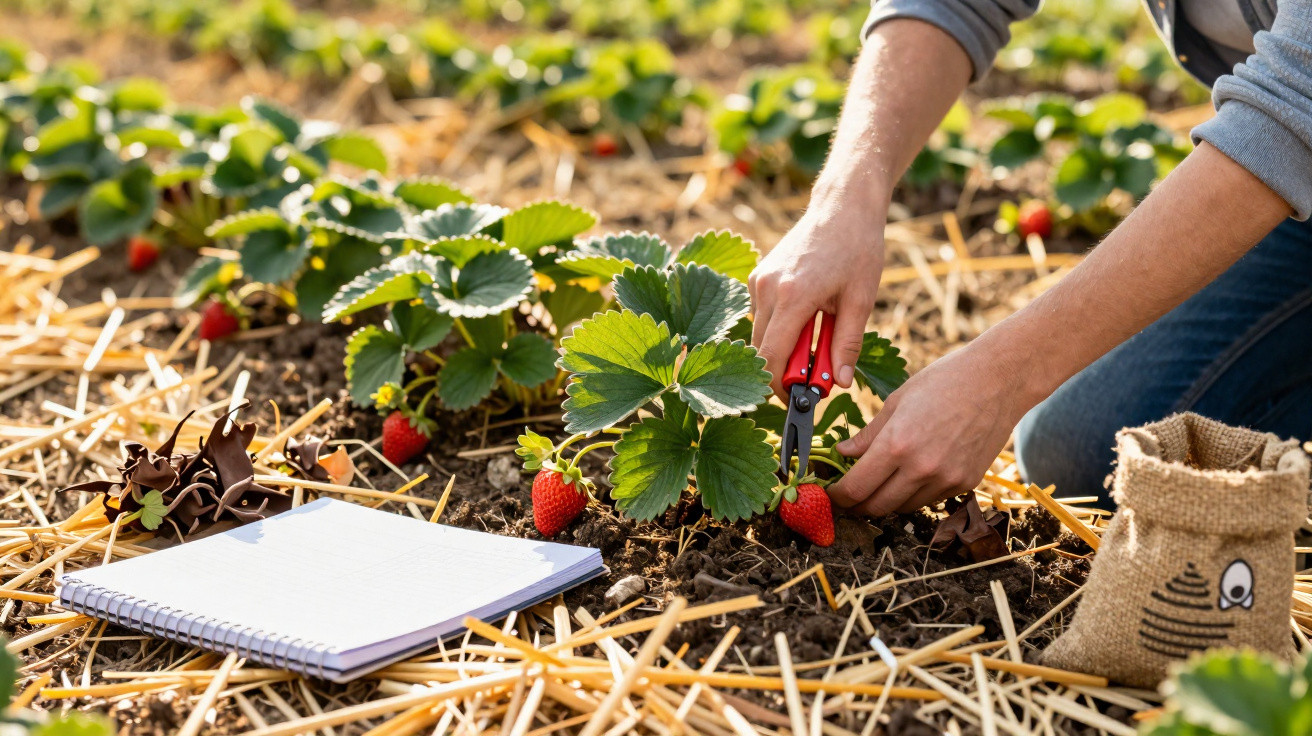
Your first move is essentially hygiene. Any brown, spotted, crisped-up, or mouldy leaves should be removed without compromise. They’re often loaded with fungal spores and act like an infection store right next to the plant.
Use clean, disinfected scissors or a sharp knife to cut the old foliage close to the base. Don’t pull it off, as you can easily damage the central crown bud or new shoots. Once the crown area is opened up, it dries faster and fungi have far less favourable conditions.
Step 2: remove weeds and eliminate competition
After tidying, it’s much easier to see what’s growing between your strawberry plants: weeds. Because strawberries are shallow-rooted, competition for water and nutrients really does hurt them.
Lift weeds carefully, roots and all. Work by hand or with a small hand cultivator, keeping your action close to the surface. Digging too deeply disrupts the delicate root network and slows growth. The more thorough you are now, the calmer the bed stays over the next few weeks.
Step 3: fertilise - correctly, and work it in shallowly
Strawberries are far hungrier than many people assume. Above all, they need plenty of potassium (potassium) to set lots of flowers and develop robust, juicy fruit.
Suitable fertilisers for April include, for example:
- an organic berry fertiliser with a high potassium content
- guano in moderate amounts
- plant feeds such as comfrey liquid or consoude brew
- pelleted organic fertilisers for fruit and berries
Scatter a few handfuls per square metre around the plants, not directly into the crown. Then loosen the surface very lightly to a depth of about 1–2 cm. This gentle working-in mixes the feed a little and helps rain carry nutrients down into the root zone.
"If you dig too deep, you cut off the strawberries’ fine surface roots - you won’t see it, but you’ll feel it later at harvest time."
Step 4: mulching - put the protective layer on last
Mulch is the final step. Only once the plants are clean, the soil is weed-free, and the nutrients are in place should you add a protective layer.
For strawberries, the best materials are those that sit loosely, break down slowly, and don’t seal the soil:
- pine needles, which have a mildly acidifying effect
- flax or hemp shiv
- fine straw (not packed down too tightly)
Aim for a layer around 8–10 cm deep. It reduces evaporation, keeps soil moisture more even, stops rain splashing soil onto the fruit (so your berries stay cleaner), and the slightly rough texture of many mulches also makes life harder for slugs and snails.
Why the right order makes such a big difference
This April routine works because it follows a simple logic: remove what causes disease or blockage first, nourish the plants next, and only then cover the surface.
| Order | Result |
|---|---|
| Mulch first, fertilise second | Fertiliser gets caught in the mulch layer and barely reaches the roots |
| Fertilise on top of old leaves | Nutrients end up in dead material; fungi benefit rather than the plants |
| Order: clean – fertilise – mulch | Maximum nutrient uptake, a drier crown area, steady yields |
When you follow the correct sequence, you’ll often notice within days that strawberries are pushing fresher growth and looking more vigorous. Later in the season, the impact shows up as more blossom and a clearly higher number of fruits.
Mistakes that quietly ruin the strawberry harvest
Many strawberry-bed issues don’t come from dramatic blunders, but from small habits that creep in over time:
- Mulch is applied in March or very early April while the soil is still ice-cold.
- Old, diseased leaves are left in place as a “protective layer”.
- A high-nitrogen fertiliser is used - plants then grow lots of leaves but set fewer flowers.
- The soil is loosened too deeply, damaging the roots.
- Plants are spaced too closely, moisture builds up, and fungi spread easily.
It’s worth taking a hard look at your own routine. Minor adjustments can translate into a noticeably bigger crop next season.
Spacing, watering, varieties: how to get even more from your plants
Alongside the core steps, the usual fundamentals still matter. Strawberries prefer airy spacing: at least 30 cm between plants in the row, and 40–50 cm between rows. That way, leaves and fruit dry more quickly after rain.
In April, watering is usually only needed in moderation because the soil still holds plenty of winter moisture. Under mulch, that moisture stays in the root zone longer. If possible, use low-limescale water, such as collected rainwater. Strawberries do best in slightly acidic to neutral soil.
If you grow everbearing (repeat-fruiting) varieties such as Mara des Bois or Charlotte, you benefit especially from the April routine. These types produce several waves of fruit, so they rely on consistently good feeding. A clean, strong start in spring can pay back right through to autumn.
Single-cropping varieties with one main harvest - for example, classic early-season strawberries - focus all their effort into that single period. For them, April feeding is particularly valuable because it goes straight into flower and fruit formation.
What mulch, soil life, and potassium have to do with each other
Many gardeners underestimate how much soil life influences yield. Organic mulches such as hemp or flax residues break down slowly, feeding soil creatures and micro-organisms as they decompose. Those organisms, in turn, release locked-up nutrients such as potassium and phosphorus, making them available to shallow strawberry roots.
If you regularly use organic material, you gradually build a quiet kind of nutrient reserve. Fungi, bacteria, and earthworms become allies. With strawberries that stay in the same spot for several years, this unseen network pays off in a big way: stronger growth, less stress, and better-quality fruit.
One final practical tip: put a fixed strawberry date in your diary for April. Two or three focused hours in the bed once a year lays the foundation for a season of brimming bowls, richer flavour, and far fewer diseases.
Comments
No comments yet. Be the first to comment!
Leave a Comment