
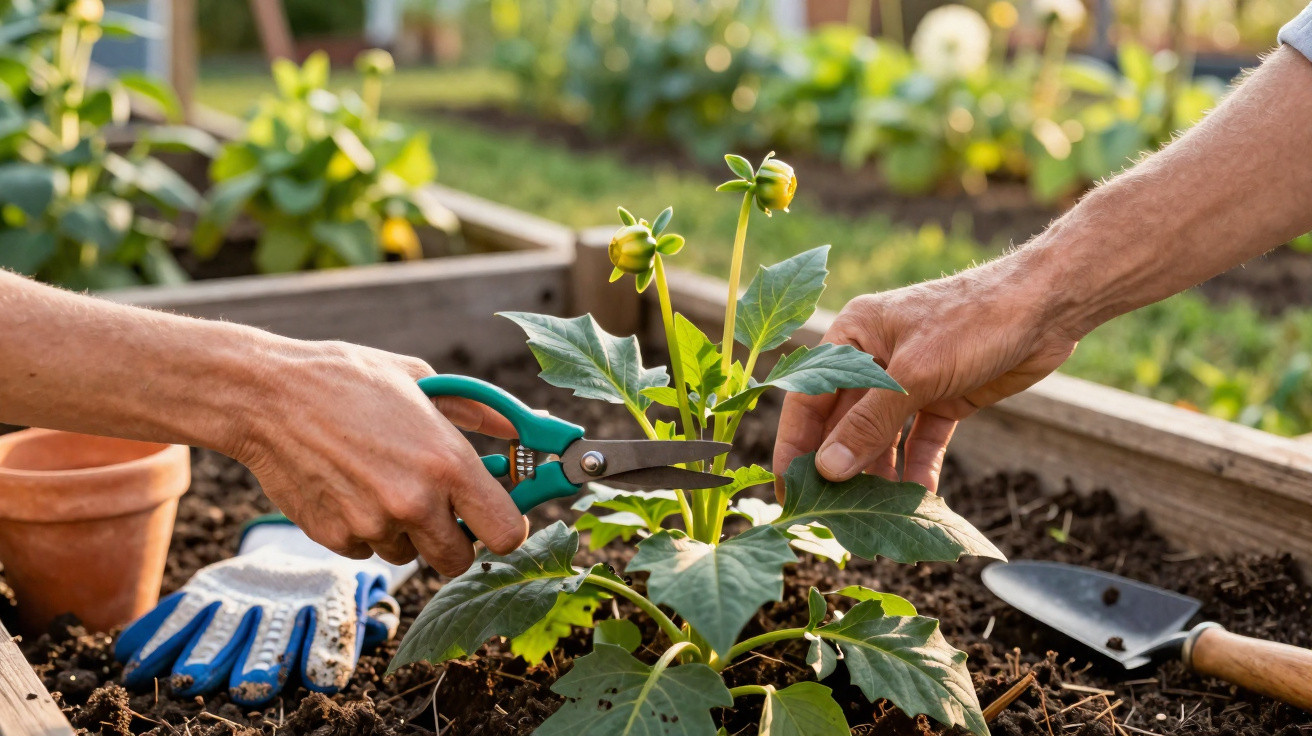
An early, fairly radical cut can change everything.
Anyone who grows dahlias will recognise the pattern: the plants race upwards, the foliage looks fantastic, and then-come flowering time-there are surprisingly few blooms, while the long stems topple over in the first proper gust of wind. That is why experienced gardeners use a technique that looks harsh at first glance: they cut off young, healthy shoots-and often get three to four times as many flowers from the very same plant.
Why an early cut makes young dahlias stronger
If you leave a dahlia alone, it follows its natural pecking order. One dominant main stem pushes upwards, takes most of the plant’s energy, and allows only a limited number of side shoots. The result is a tall, spindly plant with fewer flowers and poor stability.
Step in early, and the whole growth pattern changes. When a dahlia is roughly 20–30 cm tall and has four to five pairs of true leaves, you remove the tip of the main stem. That small intervention completely reshuffles the plant’s internal “power structure”.
A young shoot that’s topped early forces the dahlia to produce several strong side shoots-one flowering axis becomes four to six.
Trials run by major horticultural institutes show that topped young dahlias go on to produce noticeably more flowering stems over the season. The plant branches out, stays more compact, and stands more firmly, rather than ending up as a thin pole with only a few large blooms.
There is a trade-off: the first flowers usually appear 10–15 days later than on plants that were not cut. Across the whole season, though, most gardeners come out well ahead-rather than a few showy blooms, you get a genuine cloud of flowers that are also easier to cut and use in bouquets.
What happens inside the plant when you top a dahlia
Behind the method is a straightforward botanical process. The growing tip of the main stem produces the plant hormone auxin. Auxin encourages the leading shoot to keep growing and suppresses the buds on the sides. Specialists refer to this as “apical dominance”.
Once the shoot tip is removed, auxin production at that point stops abruptly. The buds that were previously held back at the leaf joints “wake up” and start to grow. Instead of a single stem, several sturdy side shoots develop-each of which can later carry flowers.
In practical garden terms, that means: more points for flowers to form, better weight distribution, and a plant that is less likely to flop over. Large-flowered varieties benefit particularly clearly, because their heavy heads need a strong framework to support them.
The perfect timing: when dahlias should be topped
Whether the plant benefits or suffers depends on getting the timing right. Gardeners do not go by a date on the calendar, but by the dahlia’s stage of development.
- Plant height: about 20–30 cm
- Leaf stage: 4–5 pairs of fully developed, true leaves
- Stem: still relatively thin, green and solid-not hollow
- Weather: a dry day, with no rain front on the way
In most areas, this point is reached around three to four weeks after planting the tubers, depending on soil temperature and the weather. If you start plants in pots, you often reach this stage earlier in a warm greenhouse or on a windowsill.
How to top dahlias step by step
The technique itself is simple, but it does require precision. Cutting too low removes useful growth, while cutting too late can even put the tuber at risk.
Tools and preparation
Some gardeners do it with their fingers; others prefer tools. Both approaches work, provided everything is clean.
- Small, sharp secateurs or nail scissors
- Disinfectant such as 70% alcohol
- Optional disposable gloves to reduce the risk of spreading pathogens
Wipe the blades with alcohol briefly before each cut so fungal spores or bacteria do not enter the fresh wound.
The cut itself
Start by locating the central main stem. On that stem, count the fully developed pairs of leaves up from the base.
- Find the second or third well-formed pair of leaves.
- Position yourself directly above that leaf pair.
- Remove the tip with a clean, straight cut.
If you are confident, you can simply pinch the tip out between thumb and forefinger. Over the next few days the plant often pauses slightly, and then new side shoots begin to appear one after another.
Don’t cut too low: the upper leaf pairs remain as the plant’s “engine” and provide energy for the new branching.
Mistakes that put dahlias at risk when cutting
The most common problem is timing: many people only reach for the scissors once the dahlia already looks substantial. By then, it is often too late.
As soon as the shoot reaches a diameter of around 1 cm, the inside becomes hollow. If you cut at that stage, you create a kind of miniature “chimney”. Rainwater collects in the opening, seeps down slowly, and can rot the tuber within a few days.
If you have missed that window, it is better to skip topping and support the plant instead. A sturdy cane and a few soft ties will usually save far more than a late cut with the scissors.
More typical stumbling blocks
- Cut too low: if there are hardly any leaves left above the cut, the plant later lacks the “solar panels” it needs for regrowth.
- Wet weather: cutting in rain gives fungi an easy entry point.
- Dirty tools: bacteria can enter directly into the plant’s vascular tissue through the cut.
- Weak plants: dahlias that are sickly or damaged by slugs should recover strength first.
When topping makes sense-and when it does not
Not every dahlia responds to the same extent. Large-flowered varieties grown in beds and borders tend to benefit most. In those settings, the goal is usually dense colour and impact, rather than record-breaking diameter in individual blooms.
If your aim is deliberately to grow gigantic single flowers-for exhibitions, for example-some growers do the opposite: they remove side shoots and leave only a few blooms so the plant’s energy is channelled into those heads. For an ordinary home garden, especially if you want cut flowers, topping young plants is typically the more useful approach.
| Garden aim | Recommended technique |
|---|---|
| Lots of flowers for beds and bouquets | Early topping at 20–30 cm height |
| Fewer, very large show blooms | Leave the main stem, limit side shoots |
| Weak-growing or diseased plants | Stabilise first, avoid heavy cutting |
Care after topping: how to get the most from your dahlias
After topping, it pays to pay close attention to soil conditions and nutrition. The plant is about to form many new shoots, so it needs steady conditions and enough energy.
- Water so the soil stays lightly moist, but never waterlogged
- Apply a mulch layer of grass clippings or leaf mould to prevent drying out
- Feed moderately, ideally with an organic flowering plant fertiliser
- Secure windy sites with canes or a support frame
Once the new side shoots start setting buds, you can selectively remove a few very weak shoots. That redirects more strength into the remaining, sturdier stems.
Why it is worth being brave with an early cut
Many gardeners hesitate to cut into a young plant that looks healthy and vigorous. The instinct is understandable-you do not want to “ruin” it. In most cases, though, doing it has the opposite effect: the dahlia later looks far more impressive, flowers for longer, and is less likely to fall over.
At the same time, this method is a great way to get a feel for plant physiology. You can see immediately how much a single cut can influence shape, stability and flower production. Once you have watched topped and untopped dahlias diverge side by side, most people do not want to be without the trick the following year.
If you are new to it, it is sensible to treat only some of your plants this way at first. That creates a small practical trial in your own garden-more convincing than any theory-and ideally ends with dahlia beds and vases looking noticeably fuller than in previous summers.
Comments
No comments yet. Be the first to comment!
Leave a Comment