
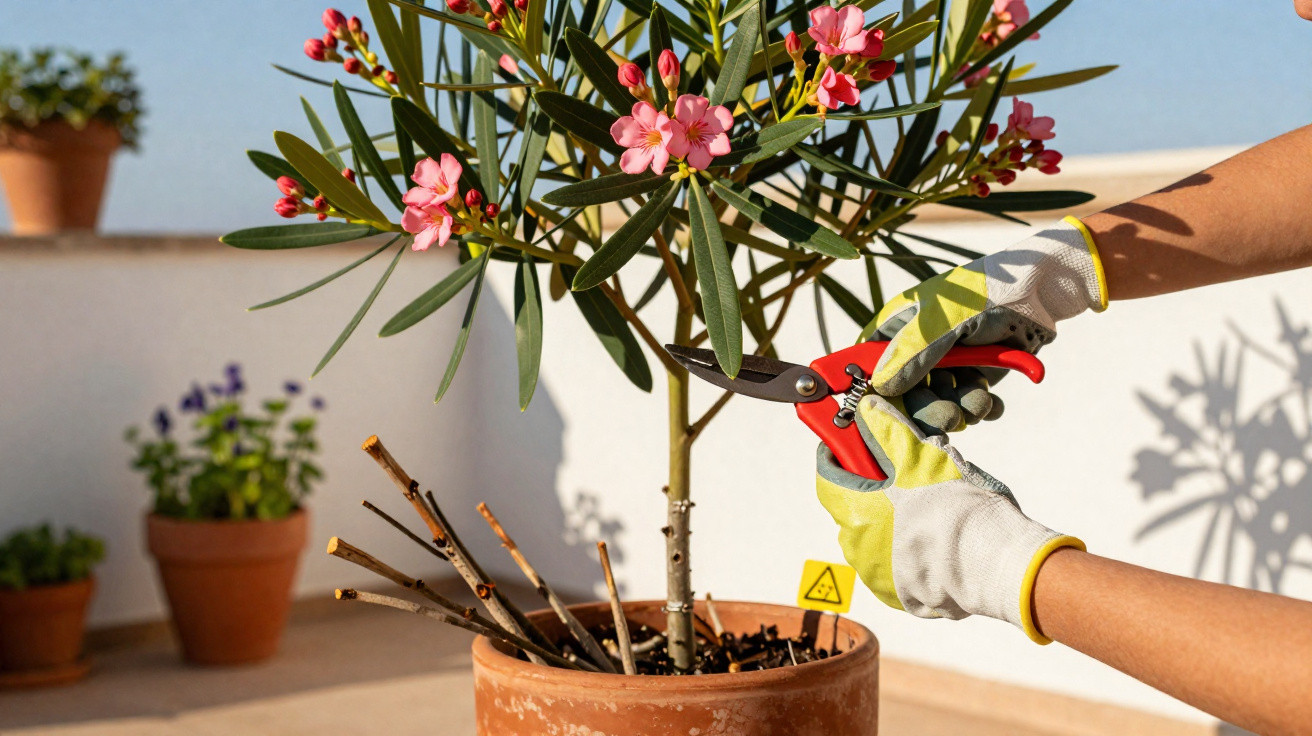
Oleander is a terrace-and-balcony staple: a hint of the Mediterranean, masses of flowers and, generally speaking, little fuss. Even so, this shrub does not forgive every pair of secateurs. One wrong cut in spring can turn the hoped-for floral display into a season of plain green growth. Get the timing right and stick to a few clear rules, and you can noticeably boost summer flowering.
Why spring pruning determines the summer display
Oleander starts forming its flower buds as early as late summer the previous year - especially at the tips of the shoots. If you shorten it indiscriminately in spring, you may well remove exactly those developing buds. At the same time, the plant needs young, well-lit growth to keep flowering through summer.
"The ideal spring prune keeps the balance: preserve enough older, bud-bearing wood, while encouraging fresh shoots for even more flowers."
Oleander flowers on new shoots that grow out from existing wood. A gentle tidy in late winter or early spring helps ensure that:
- more young, vigorous shoots develop,
- light and air reach further into the centre of the plant,
- the shrub stays compact and stable,
- flowering from June into autumn is abundant.
A heavy cut-back just before the season, by contrast, usually produces long shoots that are initially short on flowers. The plant then channels energy into leaf growth rather than buds - and the real burst of colour is pushed back by at least a year.
Best time to prune oleander: climate makes the difference
In mild areas and Mediterranean-style climates
In coastal locations or regions with very mild winters, oleander often grows outdoors in the ground. In these conditions, the best pruning window is usually from mid-March to April.
Rule of thumb: only cut once severe frost is virtually off the table. At around –5 °C, oleander can suffer significant damage. Freshly cut shoots are even more vulnerable, because the cut surfaces are exposed.
In colder regions and inland areas
Across most of the German-speaking world, oleander is grown in a container. It is overwintered frost-free in a garage, conservatory or cellar, and only goes back outside in spring.
For these plants, the guidance is:
- prune no earlier than late March - April is better,
- bring the plant out of its winter quarters first, but only on mild, frost-free days,
- then trim lightly straight afterwards.
If you keep your use of the secateurs restrained at this point, you protect the coming summer’s flowers. Major reductions to knee height or lower are best left to autumn - or to a year when you deliberately accept fewer flowers because you want to rejuvenate the plant.
How to prune oleander in spring, step by step
Safety first: oleander is highly poisonous
Every part of the plant - including the milky sap - is highly toxic. That applies to people and pets alike, so pruning should always be done with protective gear.
| Step | What to do |
|---|---|
| 1. Protection | Put on sturdy gardening gloves, long sleeves and, if needed, safety glasses. |
| 2. Tools | Use sharp, clean, disinfected secateurs (alcohol or diluted bleach). |
| 3. Disposal | Do not put the clippings on the compost; dispose of them with general waste. |
Afterwards, wash hands and forearms thoroughly, even if you wore gloves. Children and pets should not be playing nearby while you are cutting.
Remove old and diseased wood
On the first pass, focus on plant health rather than shape. Work methodically from shrub to shrub:
- Cut back all dead shoots to healthy, greenish-white wood.
- Identify frost damage (black-brown, soft-looking sections) and remove these too.
- Cut out diseased, spotted or fungus-affected shoots generously.
This stops problems spreading and opens the plant up for strong new growth. Oleander typically responds to this kind of “clean-up” with a noticeably better flush of shoots.
Thin the crown and shape the plant
The second step is about structure. Aim for an open, well-ventilated crown without a tangled interior. Typical candidates for removal include:
- shoots that cross or rub hard against each other,
- branches growing inward and clogging the shrub,
- thin, weak, very long water shoots.
Remove these either flush at the base or just above a junction. That avoids leaving stubs, which would otherwise sprout weak side shoots later on.
Shorten by no more than a third per shoot
Once the framework is in place, move on to the key finishing cuts - this is where you influence how generous the summer flowering will be. A proven rule is:
"Shorten most shoots by about a third - that way, enough flower-bearing wood is left in place."
Always make the cut just above a pair of outward-facing buds. Hold the blades at a slight angle so water runs off, allowing the cut surface to dry more quickly.
If you cut harder than this, you remove many of the buds the plant has already formed. That can be justified if the oleander has become too tall or lopsided, but it will cost you flowers in the coming season.
What to do with old or badly damaged oleanders?
Some container plants look rough after a harsh winter or years without attention: long, bare stems, sparse foliage and almost no young shoots. In cases like these, a strong rejuvenation prune is often the only effective option.
With such problem plants, you can cut all shoots back to 30 to 50 centimetres above the soil. It looks extreme, but it often prompts the shrub to reshoot densely from the base.
Key points to keep in mind:
- Do not expect many flowers in the year you cut back.
- After pruning, move the pot into brighter light gradually so the young shoots do not scorch.
- Feed appropriately, but do not overdo it, so the plant has strength for regrowth.
Care after pruning: helping the plant restart
After cutting, oleander pours energy into new shoots. The right aftercare gives that growth the best chance:
- Position: as sunny and sheltered from wind as possible. More light generally means more flowers.
- Watering: keep evenly moist, but avoid waterlogging. In pots, ensure good drainage.
- Feeding: from April, fertilise regularly with a flowering-plant feed or a dedicated oleander fertiliser.
If you want to repot straight after overwintering, it makes sense to combine that job with the spring prune. Fresh, structurally stable compost and a slightly larger pot encourage root growth - the foundation for a dense crown.
Risks, misconceptions and practical everyday examples
Common mistakes often come from good intentions. Many hobby gardeners prune oleander “like roses”, meaning hard and short. Roses then flower profusely - oleander, however, tends to respond poorly. Another frequent issue is pruning too late: if you cut back generously in May or June, you remove the basis for the flowering that is just getting started.
A practical approach for balcony gardeners is this: in the first year after purchase, remove only spent flower trusses and any clearly troublesome shoots. In the second and third years, selectively cut a few older branches back lower down to rejuvenate the shrub gradually, without sacrificing the entire crown.
One more point that is often underestimated is how you handle the clippings. Oleander branches belong neither in the fireplace nor left unattended in the garden. Even small pieces can cause severe poisoning in pets. If you want to be completely safe, bag the waste securely and dispose of it with general household rubbish.
With a little planning in spring, this seemingly tricky shrub is perfectly manageable. If you understand the link between pruning time, bud formation and the weather, you give yourself the best chance of what every oleander fan wants: a summer where you can hardly see the leaves - because everything is covered in flowers.





Comments
No comments yet. Be the first to comment!
Leave a Comment