
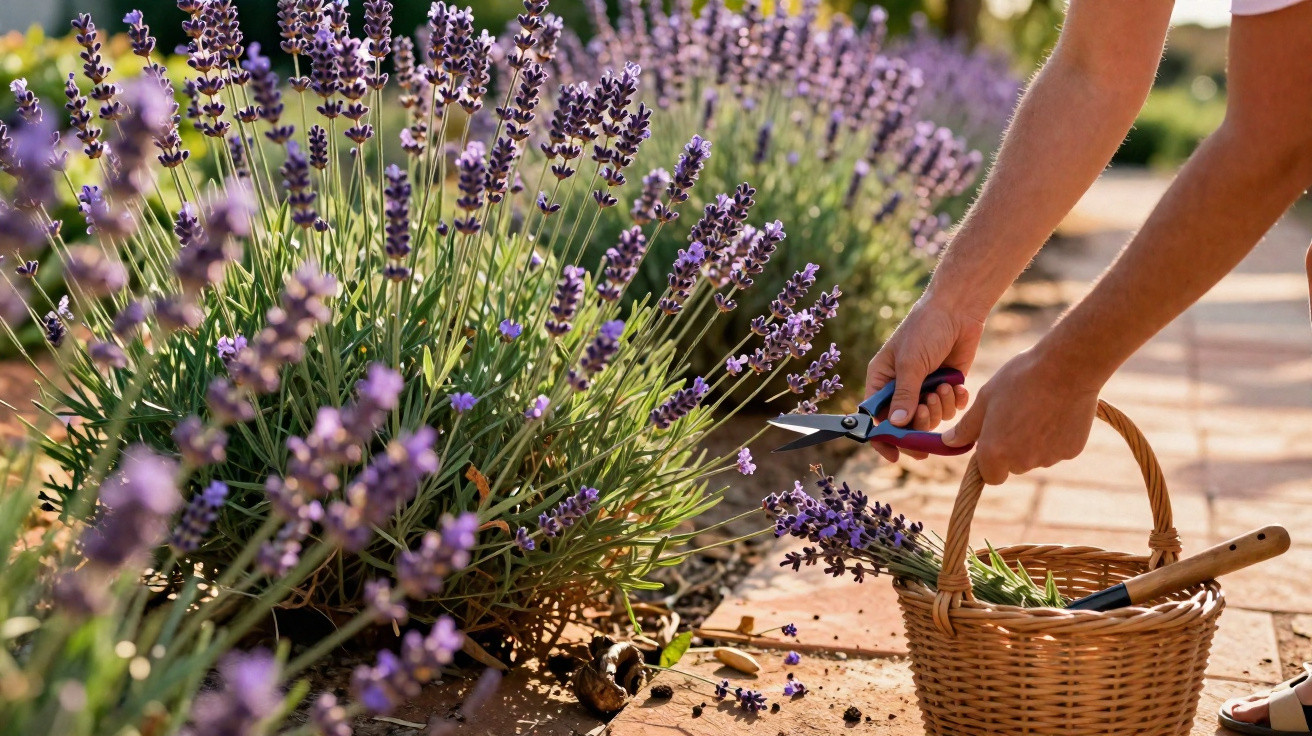
Many people blame climate change, poor soil or the age of the plant. Yet in practice, the difference between lavender dying off after a few years or flowering reliably for two decades is often down to one missing, very simple prune.
Why lavender ages so quickly without pruning
Lavender isn’t a typical soft-stemmed perennial; it’s a semi-shrub. In other words, it becomes woody at the base while the growth on top stays soft and green. That’s exactly where the trouble starts: the older, brown wood only sends out new shoots sporadically. If you simply let the bush grow unchecked, the same pattern tends to appear after a few years:
- the centre becomes bare
- stems splay outwards and collapse
- the plant ends up looking like a dried-out twig broom
If you then reach for the shears late and cut boldly back into the brown wood, it’s usually already too late. Many of those branches won’t come back at all. The result is a slow decline, often long before the plant’s true potential lifespan.
"Regular pruning in the green growth can increase lavender’s life expectancy from under ten to up to twenty years."
When lavender is cut correctly every year, it stays dense and rounded and keeps producing fresh, flower-ready shoots. It looks younger - and remains biologically vigorous.
The two best times to prune lavender
Uncertainty is common: plenty of amateur gardeners avoid cutting lavender because they fear getting the timing wrong. In reality, two pruning windows have proved themselves, with small adjustments depending on climate and location.
Main prune after flowering
The key cut is immediately after the main flush of bloom. A typical period is from late August to late September. By then the plant has invested energy into flowers, begins to recover, and responds well to a stronger trim - as long as you stay in the green, leafy part.
Shaping prune at the end of winter
The second opportunity comes at winter’s end, between February and March. Before sap flow ramps up too much, you can fine-tune the shape, take out dead pieces, and encourage fresh branching.
Depending on where you garden, the timing shifts slightly:
- Milder regions: main prune after flowering; a light shaping cut is often possible from late February, as long as the buds are still tight.
- Cooler sites (further north, higher uplands, alpine foothills): in autumn, focus on removing spent flower stems; leave the real shaping and maintenance cut until March, choosing frost-free days.
The calendar is only a rough guide. If you’re unsure, read the plant: once the flowers are finished, the foliage is still green, and there isn’t strong new growth surging, the moment is usually right.
The single most important rule: cut only into green wood
The core technique is surprisingly straightforward - and still commonly missed: lavender will tolerate pruning, but only in the green, leafy section.
"Never cut lower than just above the last tier of green leaves - this invisible ‘safety line’ saves many lavender plants."
In practical terms, do it like this:
- Look at the plant from the outside and identify where green leaves are still present.
- Imagine a line just above the final pairs of leaves.
- Place every cut so that at least a few centimetres of green growth remain.
If you cut down into the brown, bare wood, you risk those stems never shooting again - and older lavender bushes, in particular, can be very unforgiving.
Step-by-step: how to prune lavender correctly
With the right sequence, pruning feels far less daunting and is manageable even for beginners. Before you start, check your tools: clean, sharp, disinfected secateurs significantly reduce disease risk.
1. Remove spent flower stems
Start by taking off the faded blooms. Cut the flower spikes back to just above the first pair of leaves. This “cosmetic cut” immediately makes the plant look tidier and stops it putting too much energy into seed production.
2. Reduce the green growth
Next, shorten the entire green section by about a third. At this stage, perfect shape is less important than getting the plant back into a compact, cushion-like size.
- With young plants, you can cut back up to half of the green shoots.
- With older specimens, stay more cautious and remove no more than a third.
3. Round off the shape
Finally, give lavender its classic cushion form. Bring the shoots to a similar length, remove hard corners, and take out any single stems that stick out too far. The aim is to let air and light reach towards the centre without creating gaps.
"The more even the ‘lavender ball’ looks, the more stable it stays - and the less likely stems are to flop under snow load or heavy rain."
Young, mature and old lavender bushes - what changes?
Not every lavender plant needs the same approach. Age - and the type you’re growing - makes a difference.
| Age / type | Pruning strategy |
|---|---|
| Young plants (1–3 years) | Prune fairly hard, up to half of the green shoots; this encourages strong branching and a dense base. |
| Mature plants (lavender, lavandin, French lavender) | Cut only in the green growth, always leaving 3–5 cm of leafy shoots; maintain the shape well. |
| Very old shrubs | Rejuvenate gradually by removing only some of the oldest stems each year; if the base is completely bare, replace with new plants. |
Many gardeners feel attached to older lavender bushes. If no green shoots appear from the base any more, a drastic renovation is rarely worth it. It’s better to take cuttings from the best, still-vigorous plants in good time and establish young replacements elsewhere.
Common mistakes that cost lavender its life
Certain pruning errors come up again and again - and they can dramatically shorten a plant’s lifespan:
- Brutal cutting into old wood: shoots are taken right back, then remain dry and never reshoot.
- Cutting during strong spring growth: heavy pruning at peak sap flow weakens the plant considerably.
- Skipping pruning entirely: the plant may look great at first, but it reaches the “bald broom” stage much sooner.
- Pruning in damp, cold weather: this encourages fungal disease and rot at the cut surfaces.
Avoid these traps and stick to the green safety line, and you’ve already done the most important part.
Why this pruning method works so well
The principle behind the technique is simple horticulture: active buds sit in the green growth, and after a cut they quickly form new side shoots. That creates a denser, finer framework. Year by year, the plant builds a compact structure made up of young, productive stems.
"Lavender stays young for longer when it’s deliberately forced into growth instead of being allowed to turn woody unchecked."
Rather than pouring energy into long, woody stems, the plant shifts effort into lots of short shoots with strong flowering potential. More light reaches the leaves, moisture dries faster, and the risk of fungal problems drops.
Useful extra tips for long-lived lavender
Correct pruning is half the battle, but a few additional points can extend lavender’s lifespan even further:
- Position: full sun, airy, on the dry side - waterlogging kills faster than drought.
- Soil: lean, ideally sandy or gravelly, and free-draining; if needed, open it up with grit or sand.
- Feeding: be very sparing - it’s often best not to feed at all. Too many nutrients make shoots soft and prone to snapping.
- Variety choice: in colder regions, tougher lavandin varieties are often more dependable than more delicate French lavender.
If you’re planting from scratch, it pays to establish the rhythm from the beginning: in the first years after planting, cut back regularly and quite firmly in the green growth so a dense framework develops. Later on, the annual two-part routine - after flowering and at winter’s end - is usually enough.
Handled this way, lavender not only lives longer but also produces more fragrant blooms for bouquets, scent bags, or as bee forage. With sharp tools, a clear eye on the green safety line, and the confidence to make the cut, you can almost double the lifespan of those blue garden mounds.
Comments
No comments yet. Be the first to comment!
Leave a Comment