
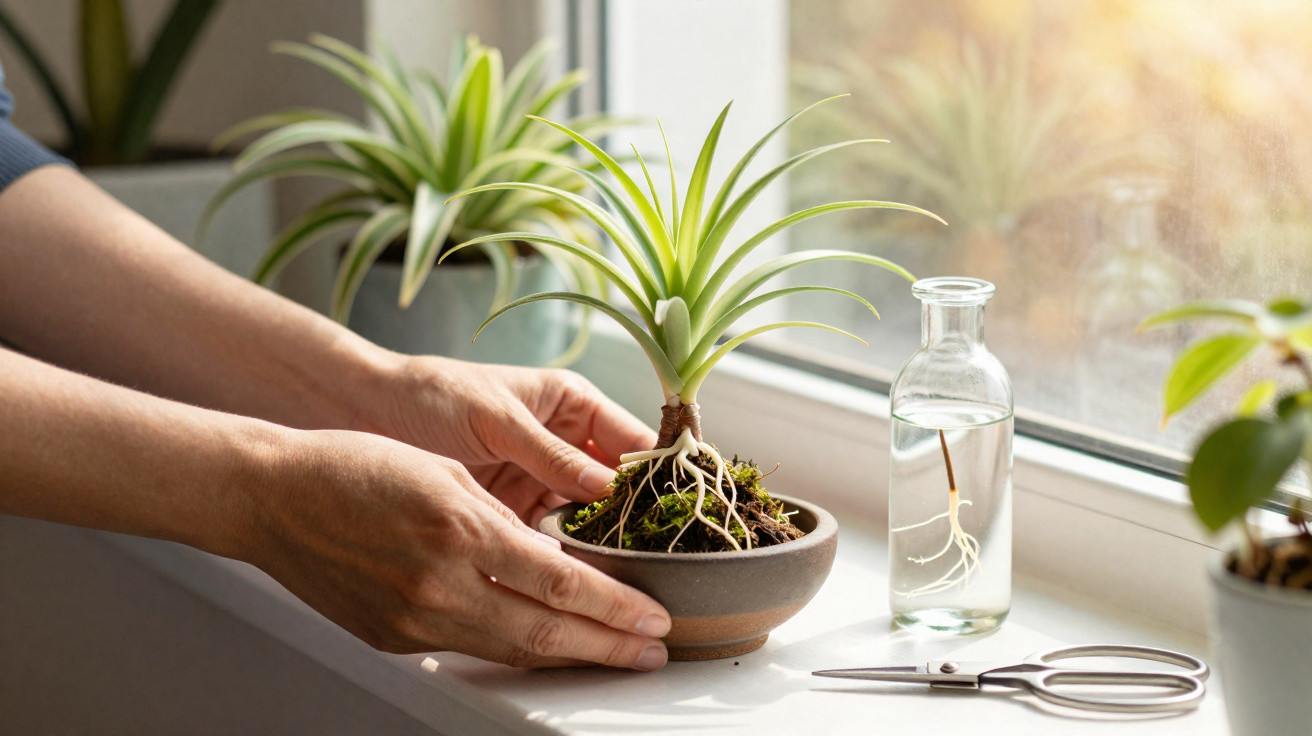
Many people have one sitting somewhere: a hardy green plant in a pot, almost unnoticed among books, photos and keepsakes. What few realise is that this everyday houseplant can, with a bit of know-how, be turned into a living art piece that looks like a true bonsai - without a years-long test of patience.
This everyday plant has hidden bonsai potential
The focus here is the well-known spider plant, Chlorophytum comosum - seen in hanging baskets, on window sills or on top of a filing cabinet in the office. Most of the time it’s appreciated simply for its long, arching leaves: a pleasant, familiar classic in home décor, but rarely a showstopper.
It becomes far more interesting when you look at the plant from below. Under the compost, the spider plant develops thick, swollen roots. These storage roots are white to cream and, with a little imagination, can resemble a miniature trunk. That’s exactly what makes a bonsai-like appearance possible.
"The idea: the underground storage roots are gradually uncovered and showcased - creating a small ‘tree on legs’."
There’s another advantage for homes with animals: spider plants are considered non-toxic for cats and dogs. So a mini tree on the coffee table isn’t a danger to curious four-legged companions.
Laying the groundwork: how to keep a spider plant thriving
Before you start reshaping it, the plant needs a strong foundation. Only a vigorous, healthy spider plant will produce storage roots thick enough to work as a “trunk”.
The right location
- Bright light, but not direct sun - a north- or east-facing window is ideal
- Avoid strong midday sun, which can scorch the leaves
- Room temperature of roughly 15 to 24 °C
- No draughts; keep clear of radiators
Spider plants are fairly tolerant, but these conditions encourage stronger growth and lots of storage roots - the essential basis for the later root “sculpture”.
Compost and watering routine
A loose, nutrient-rich compost for houseplants works well. At the base of the pot, a layer of expanded clay pellets or coarse gravel helps excess water drain away.
When it comes to watering, slightly too dry is better than constantly wet. In summer, one thorough watering per week is usually enough; in winter, far less. Let the top few centimetres of compost dry out in between.
"A practical rule of thumb: as long as the fresh leaves in the centre of the plant are standing upright, it usually still has enough water."
Making the roots visible: step by step to a bonsai effect
The key to the bonsai look is how the roots are displayed. They aren’t cut away; instead, they’re revealed little by little during repotting.
Raise the plant when repotting
When roots start emerging from the drainage holes or the compost is clearly being pushed upwards, it’s time to repot. The approach is as follows:
- Carefully ease the plant out of the old pot.
- Remove some of the old compost from around the root ball.
- Position the plant slightly higher than before in a new pot that is ideally shallow and wide.
- Add only enough compost so the thickened upper roots remain partly exposed.
With light and air exposure, these roots gradually change in appearance over the months, becoming more pronounced and textured. Each time you repot, you can uncover them a little more.
Direct the eye: choosing the right “bonsai pot”
A classic bonsai sits in a shallow tray that draws attention to the trunk and canopy. For a spider plant, a wide pot that isn’t too deep - with good drainage - works best. You can arrange it like this:
- Leave compost in the main root area
- Don’t cover the exposed roots with compost
- Top-dress the visible compost surface with fine gravel or small, dark stones
That mineral top layer visually highlights the combination of exposed roots and leafy crown. You can also remove many side shoots and small plantlets (the familiar dangling “baby plants”) on purpose. This encourages the plant to thicken its root system instead of spending energy on a cascade of foliage.
The bottle method: a vertical root trunk in record time
If you want a particularly straight, column-like “trunk” made from roots, a simple tool can help: a transparent plastic bottle.
How the method works in practice
- Cut the top and bottom off a clear plastic bottle so you’re left with a hollow cylinder.
- Place this cylinder centrally inside a larger pot.
- Fill only the inside of the bottle with light, loose compost.
- Plant a young spider plantlet at the top into this compost.
The young roots then grow downwards to reach moisture below. Because there’s limited space to spread sideways, they’re forced to grow almost straight down. This forms a compact, vertical root column.
After about a month, the cylinder can be carefully cut open with scissors or a craft knife and removed. If the root “trunk” is still very slim, simply leave the tube in place longer until enough mass has developed.
"The result looks like a single trunk carrying the spider plant’s leafy crown - a very modern bonsai look with minimal effort."
Caring for the mini tree: more attention, but no stress
Once you’ve achieved the shape you want, the aim is to maintain it. Because bonsai trays and shallow pots hold little compost, they dry out faster than a deep standard pot.
Watering and nutrients
- Regularly check the top 2 cm of compost with your finger
- When that layer feels dry, water thoroughly and let excess drain away
- During the growing season (spring and summer), use a lightly dosed liquid houseplant feed every two to four weeks
- Feed far more sparingly in autumn and winter
Watering too often can cause the exposed roots to rot. Mild dry spells, on the other hand, often stimulate stronger root growth - within the plant’s tolerance.
Keeping the shape with pruning
Longer leaves that disrupt the overall form can be shortened with sharp scissors. Don’t cut all leaves back hard at once; instead, trim only a few that stand out each time. Any unwanted plantlets should be removed right at the base.
This keeps the silhouette compact, makes the “crown” look denser, and draws even more attention to the trunk area.
Why a spider plant mini-bonsai is worth it
The effort involved in this home-accessory trick is manageable, and the impact is surprisingly strong. Instead of a generic houseplant, you end up with an object that stands out the moment guests enter the room. The look really shines on sideboards, low shelving units or desks.
For beginners interested in bonsai styling, the spider plant offers a gentle way in: it forgives care mistakes more readily than traditional bonsai species such as spruce, maple or pine. At the same time, it demonstrates just how much “trunk building” alone can transform a plant’s overall effect.
If you feel like experimenting further, you can try similar techniques - exposed roots, bottle cylinders, mineral top-dressing - with other tough houseplants, such as certain dracaenas or compact ficus varieties. The key rule remains the same: the plant must be healthy and settled in its position before you start working with the roots.
Especially in smaller homes where there isn’t space for large indoor trees, a spider plant mini-bonsai is a charming solution: it takes up little room, needs relatively little care, and looks far more individual than the standard pot on the window sill.

Comments
No comments yet. Be the first to comment!
Leave a Comment