
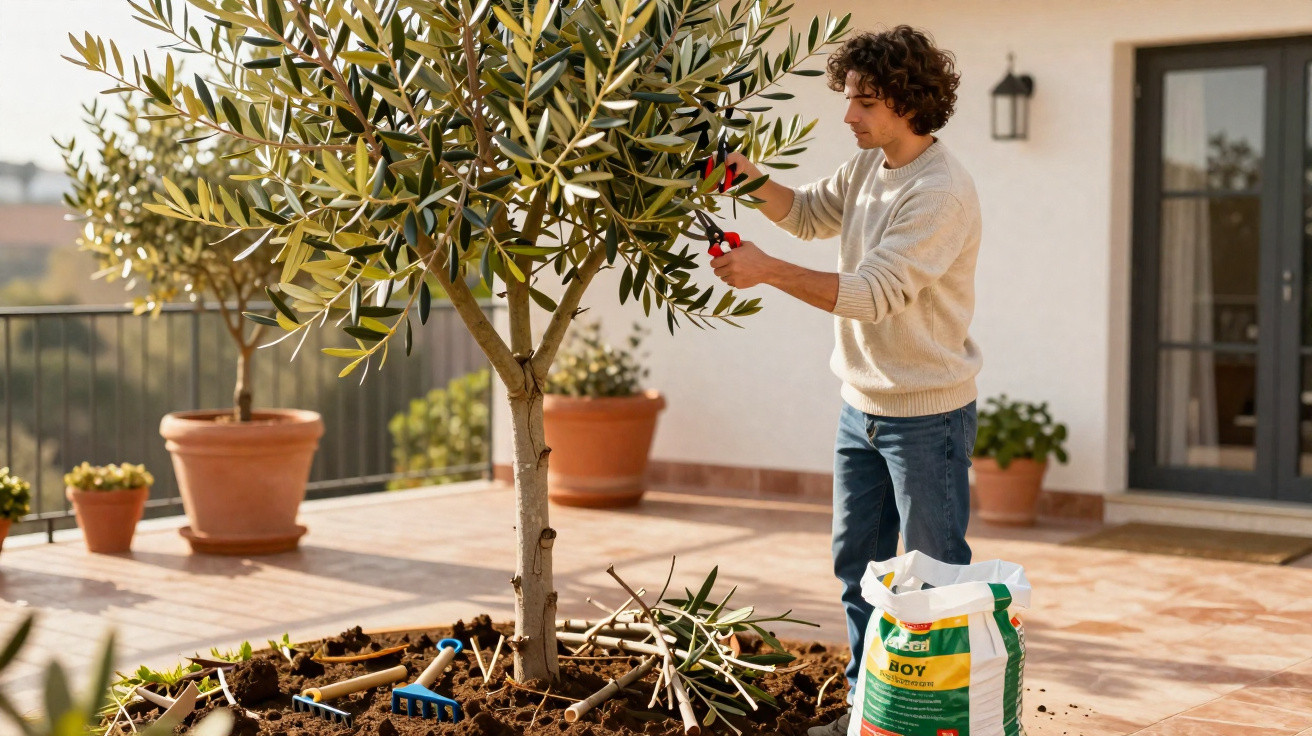
Although the olive tree is considered tough and undemanding, it’s the tail end of winter that often determines how generously it flowers in summer - and whether olives form at all. Prune at the wrong moment now, or go overboard with fertiliser, and you can seriously suppress flower production. A few well-chosen steps are usually all it takes to avoid that.
Why the end of winter is the key moment for flowering
As soon as the days begin to lengthen and the hardest frosts have passed, the olive tree starts to stir again. Sap slowly rises through the trunk, and buds begin to move - even though the tree hasn’t yet entered full growth. This in-between stage is precisely when pruning and general care work best.
"If you care for your olive tree during a mild, frost-free window at the end of winter, you direct its energy straight into flowers and fruiting shoots."
In Central Europe, this period typically falls between mid-March and the end of April. In very mild areas it may arrive a little earlier, while in cooler locations it can be a week or two later. What matters most is choosing a mild, dry day, with no night frost expected.
Leave pruning until much later in spring - when temperatures climb and water demand shoots up - and the tree can become stressed very quickly. Flower buds often end up on the cuttings, while the crown has to cope with heat, dryness and wound healing at the same time. That combination reduces yield.
The one mistake that ruins flowering
The biggest blunder many people make is this: they cut the olive tree back hard in May, or even at the start of summer, and then apply a generous dose of nitrogen fertiliser. It may look “healthy” at first glance, but over time it does real damage to flowering.
"Late pruning during the first hot spell plus strong nitrogen fertiliser produces lots of leaf mass, but far fewer flowers."
The tree responds by pushing out long, soft shoots that demand a lot of water yet set hardly any flowers. The flower buds removed in the cut are gone for good, and the tree has to invest its reserves in replacing wood instead. That can cost an entire year’s crop - and for weaker trees, even several.
Just as damaging is a drastic prune immediately after a severe frost spell. Conducting tissues and young growth are then already weakened, wounds seal poorly, and fungal diseases gain an easy foothold.
How to prune your olive tree correctly now
Many gardeners approach an olive tree cautiously with secateurs in hand. A clear sequence makes it much simpler. Follow the steps below in order and an attractive shape tends to emerge almost automatically.
Step 1: Remove dead and diseased wood
- Cut out any dry, brittle branches
- Remove shoots that are badly affected by fungus or heavy lichen growth
- Trim damaged or broken branches back neatly into healthy wood
This stops the tree wasting energy on dead tissue and makes the crown easier to assess. On thicker wood, aim for smooth cuts so the wounds can callus over quickly.
Step 2: Open the crown - aim for a “goblet” shape
Olive trees crop best when light and air can reach into the centre. Gardeners often refer to the “Gobelet” or goblet/bowl form (also described as a chalice shape).
To achieve it:
- Keep 3 to 5 strong scaffold branches spaced around the trunk
- Remove branches that grow straight up through the centre
- Take out shoots that cross or rub against each other
- Remove branches that grow strongly inwards into the crown
"A good rule of thumb is that a small bird should be able to fly through the crown without constantly hitting twigs - that’s when the light levels are right."
Step 3: Cut back “gourmands” consistently
Olive trees often throw up multiple upright, extremely vigorous water shoots from the base and from thick branches. These so-called “gourmands” consume a great deal of sap, but they produce very few flowers.
Cut these shoots off as close as possible to where they emerge. If you leave them too long, they become woody and can only be removed with a robust saw. A quick regular check takes only minutes, but it saves major work later - and prevents noticeable yield losses.
Step 4: Tidy the ground around the trunk
If a thick layer of old leaves, weeds or overly compacted mulch has built up beneath the tree, it’s worth clearing it away:
- Remove fallen leaves and wood debris (many fungal spores overwinter in it)
- Gently loosen the topsoil with a hand hoe
- Keep the root collar clear - it must not be buried or covered with a thick mulch layer
This keeps the area around the trunk well ventilated and helps prevent waterlogging. Both steps significantly reduce the risk of rot and fungal problems.
Targeted feeding instead of over-fertilising
After pruning, the olive tree needs fresh energy. Because it originates from the Mediterranean, many people assume feeding is unnecessary. On very poor soils, that can stall growth; too much fertiliser, however, misses the target completely.
What an olive tree actually needs
A modest nutrient boost is enough:
- Mature compost or fully rotted farmyard manure applied in a thin layer over the root zone
- A mineral specialist fertiliser for olives or Mediterranean shrubs, used at a low dose
- An emphasis on potassium and phosphorus to support flowering and fruit set
Excess nitrogen drives lush leaf growth at the expense of flowers. It’s better to apply less and, if needed, feed a second time very moderately in early summer rather than overdoing it in one go.
| Nutrient | Effect on the olive tree |
|---|---|
| Nitrogen (N) | Boosts leaf growth; in excess it weakens flowering |
| Phosphorus (P) | Encourages root development and flower initiation |
| Potassium (K) | Strengthens tissue, improves resilience and enhances fruit quality |
Protect the leaves: spot problems early
A common visitor on olive leaves is so-called peacock spot disease. It appears as dark, round patches, and later the centre of the spot can fall out. Leaves turn yellow and drop, leaving the crown thin.
In home gardens, many people use low-dose copper products against this fungal disease. A light spray coating at the end of winter, applied in dry conditions, protects the young, delicate leaves. Important: don’t spray in rain, otherwise the treatment is simply washed off.
Scale insects also like olives, often followed by a black coating known as sooty mould. With light infestation, wiping the shoots with a damp cloth is often enough. Under heavier pressure, many gardeners use plant-oil-based products or diluted soapy solution, which coats the pests and suffocates them.
Special considerations for potted olive trees on balconies and terraces
Olives in pots are usually positioned closer to buildings and therefore sit in warmer conditions than those in the ground. That often makes their growing season start earlier - and it also means they react more sensitively to care mistakes.
- Don’t carry out spring pruning until no severe frosts are expected
- Avoid waterlogging completely; use pots with a drainage hole and add a drainage layer
- Provide a bright position without constant harsh midday sun early in the season
- If late frosts are forecast, move the container temporarily against the house wall or protect it with horticultural fleece
Young container plants in particular can quickly lose fresh shoot tips during a late cold snap. A simple frost-protection fleece is usually enough to save these sensitive parts and safeguard the coming flowering.
Why the right timing achieves more than any specialist fertiliser
If you prune your olive tree at the right moment and keep feeding restrained, expensive “miracle” products are often unnecessary. What matters is preventing the tree’s energy from being wasted:
- Less “empty” wood that consumes only water and nutrients
- More light reaching the fruit-bearing branches
- Lower risk of fungal disease thanks to an airy crown
- Firm, well-ripened shoots instead of soft water shoots
The benefit is clear in the following year: trees pruned on time at the end of winter usually crop more evenly, with fewer failures and less alternation (switching between a heavy crop and a rest year).
Practical visual check: how to tell whether you’ve pruned enough
Many people stop too early and leave the crown too dense. A simple check helps: take three or four steps back and look at the tree calmly. If you can clearly see the sky between branches in several places, the structure is about right. If you can see almost nothing but foliage, you can remove a few more obstructing twigs.
If you’re unsure, start with a smaller side branch, note how the result looks, and then gradually apply the same form across the whole tree. Experience builds quickly - and the fear of pruning tends to disappear just as fast.


Comments
No comments yet. Be the first to comment!
Leave a Comment