
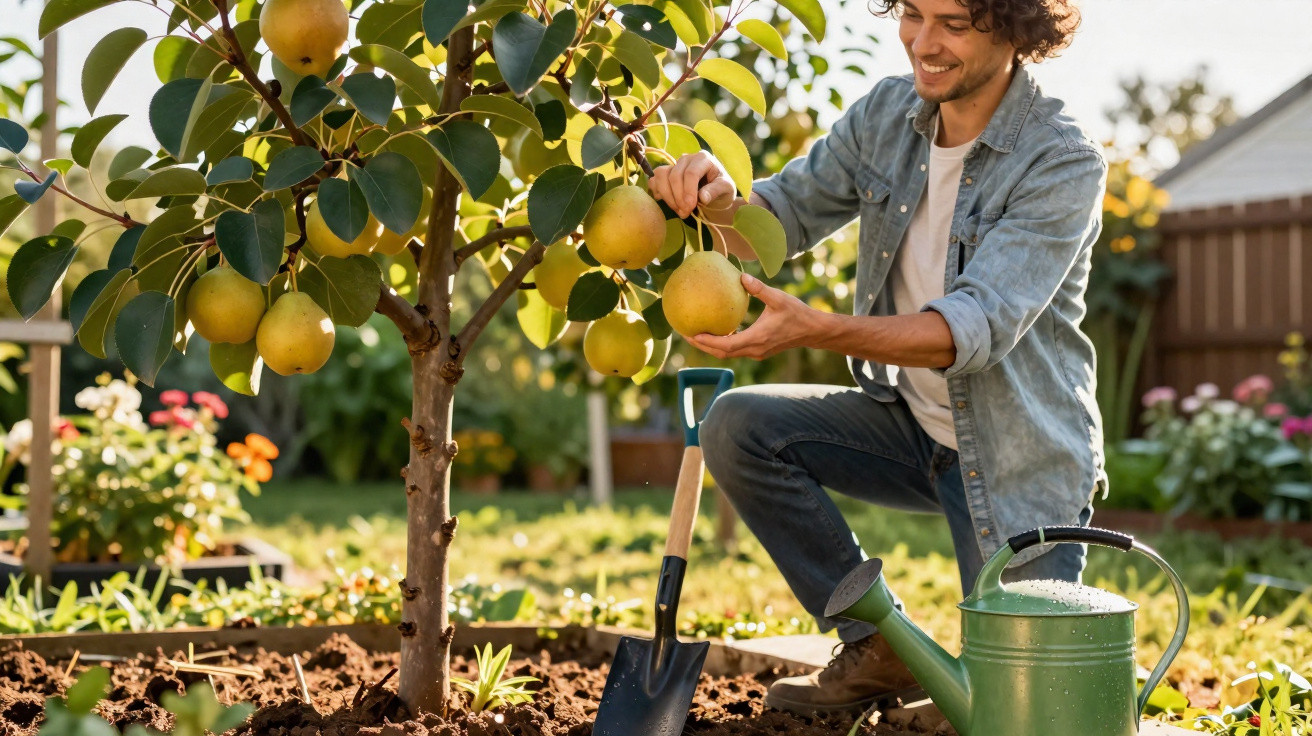
Spring, new beds, empty fruit corners: anyone planting now can soon look forward to a completely different kind of “pear”.
In spring, many hobby gardeners automatically reach for apple and pear saplings because they are the familiar staples in most garden centres. Yet there is an Asian fruit tree that is almost as straightforward to plant as an apple tree, while producing fruit reminiscent of a cross between apple and pear - exceptionally juicy, but with a beautifully crisp bite.
An unusual fruit tree with a surprise factor
What makes Nashi so special
The star here is the Nashi, commonly known in the UK as the “apple pear”. At first glance it looks like a round, golden-yellow apple. But the first bite makes it clear you are dealing with something different: it tastes delicate and aromatic like a pear, while staying noticeably firmer and crunchier.
“Nashi combines the sweetness of a pear with the bite of an apple - and in the garden it’s far tougher than many people expect.”
Planting a Nashi does more than provide a talking point at the next barbecue. It broadens the range in your home orchard, gives bees an extra nectar source, and brings to your table a fruit many people only know from Asian supermarkets.
Site: full sun and dry feet
Nashi thrives on warmth and light. A position in full sun is effectively essential if you want the fruit to develop its full aroma and enough sweetness. The tree will still grow in partial shade, but yields there are typically much lower and the flavour less pronounced.
Soil matters just as much. The roots are sensitive to waterlogging. The best conditions are a loose, humus-rich soil that drains well. If you have heavy clay, it helps to mix in:
- Coarse sand to improve structure
- Mature compost for nutrients
- If needed, a little fine gravel at the bottom of the planting hole
Preparing the soil in this way prevents standing water, lowers the risk of root rot, and gives a young tree the strongest possible start.
Step by step to successful planting
The right time in spring
The ideal planting window is towards the end of March, once the ground is no longer frozen and is beginning to warm up. In many areas, severe frosts are unlikely by then, while evaporation is still low. This gives the tree time to establish roots before summer puts it under pressure.
Dig the planting hole roughly twice as wide and twice as deep as the root ball. That makes it easier to incorporate soil, compost and sand thoroughly. Before placing the tree, do a quick check: if water remains standing in the hole, the ground below is too compact - in that case, add a layer of gravel or grit first.
Why a sturdy stake is essential
After positioning the tree comes a step that is often underestimated: installing a support stake. Young Nashi trees have a sensitive root zone, and in loose soil they can sway in strong winds. That movement can tear fine roots and slow establishment.
Drive the stake in before you finish backfilling the hole, so roots are not damaged. Then use a wide, soft tie to secure trunk and stake in a loose figure-of-eight. This reduces rubbing while still keeping the tree stable.
“A single stake, set properly, often decides whether a young tree grows arrow-straight in its first years or ends up leaning as it reaches for the sky.”
Why a lonely Nashi produces hardly any fruit
The tree needs a “partner”
One key point surprises many garden owners: most Nashi varieties are self-sterile. They flower abundantly in spring with white blossoms, but if planted on their own they set very little fruit. Reliable fruiting only follows when pollen from a suitable partner is available.
The fix is straightforward: a compatible pear tree needs to be nearby. Flowering times must overlap so bees can carry pollen between the trees. A classic pear such as the Williams variety, or other common dessert pears from the garden centre, is well suited.
How far away the pollinator can be
Keep the distance between Nashi and pear as short as possible. In practice, a radius of 10 to 20 metres has proven effective. In a typical suburban garden it can even be enough if a neighbour has a pear tree and the two trees can “see” each other.
- Nashi without a partner: plenty of blossom, almost no yield
- Nashi with a pear tree within 20 m: significantly more fruit
- Two different Nashi varieties side by side: pollination is often even better
So if you are only just planning a garden, it makes sense to build in a small “duo” from the outset: Nashi plus a classic pear.
Water: the decisive factor right after planting
Soak thoroughly once - don’t just sprinkle
To finish planting, give a proper, generous watering. Even if the soil feels slightly damp or rain is forecast, a newly planted tree needs a substantial drink: 15 to 20 litres poured directly onto the root ball is a good rule of thumb.
“The first heavy watering presses the soil onto the roots, closes air pockets and secures contact between tree and ground.”
Air gaps can cause fine roots to dry out. A deep soak eliminates exactly that risk. Shaping a small soil ridge as a watering ring keeps the water where it is needed, instead of letting it run off into the lawn.
The first months: keep moisture steady, but don’t drown it
Through the rest of spring and into summer, check the young tree regularly. A simple guideline: the top five centimetres of soil may dry slightly, but underneath it should still feel moist. If the root ball dries out completely, Nashi trees can react badly.
A thick mulch layer of (pre-dried) grass clippings, leaves or woodchip around the trunk helps enormously. Aim for five to ten centimetres, but leave a small gap directly around the trunk so the bark does not rot.
- Watering interval in spring: depending on weather, every few days
- In midsummer: during heat, check several times per week
- Renew the mulch layer regularly as it breaks down
When the first harvest is realistic
Patience pays off quickly
If you plant a grafted Nashi standard or half-standard today, you can often expect the first worthwhile crops after three to four years. Young trees may produce a handful of fruit earlier, but the harvest becomes truly rewarding once the tree has built a stable canopy.
Ripe Nashi fruit shows an even colour, yields only slightly to gentle pressure, and has a subtle scent. By late summer or early autumn, the time comes: the fruit should pick easily without having to tug hard.
| Feature | Nashi | Classic pear |
|---|---|---|
| Fruit shape | Round, apple-like | Typically pear-shaped |
| Texture | Very crisp, juicy | Softer, melting |
| Storage life | Several weeks in the fridge | Often shorter, depending on variety |
| Use | Fresh, salads, dessert | Fresh, stewed fruit, cakes |
How to use Nashi day to day
Fresh, in salads or on the barbecue
Nashi works well in fruit salads because it does not turn mushy as quickly. Sliced thinly, it adds a crunchy, sweet-fresh note to green salads. In Asian-inspired cooking, Nashi often appears in savoury dishes too - for example finely shaved with ginger or chilli.
It is also worth trying on the barbecue: briefly grilled slices with a little honey and lemon juice make a quick dessert that, in late summer, can come almost straight from your own garden.
Benefits and possible stumbling blocks
Nashi trees are considered hardy and relatively unfazed by many typical pome-fruit diseases. They cope with winter temperatures across large parts of Germany, Austria and Switzerland, and with good care they bear reliably. Anyone with experience of apples or pears will usually find pruning familiar, as the canopy structure is similar to the well-known species.
Even so, a few things deserve attention. Severe late frosts during flowering can reduce the crop, as is common with pears. In very damp locations the risk of fungal diseases increases - an airy position and a restrained, more open canopy help here. And without a suitable pollinator, the tree’s potential simply goes unused.
Anyone who plans for these factors gains a fruit tree that sensibly complements traditional varieties, increases diversity in the harvest, and makes it clear with every bite why the small extra effort at the planning stage was worthwhile.

Comments
No comments yet. Be the first to comment!
Leave a Comment