
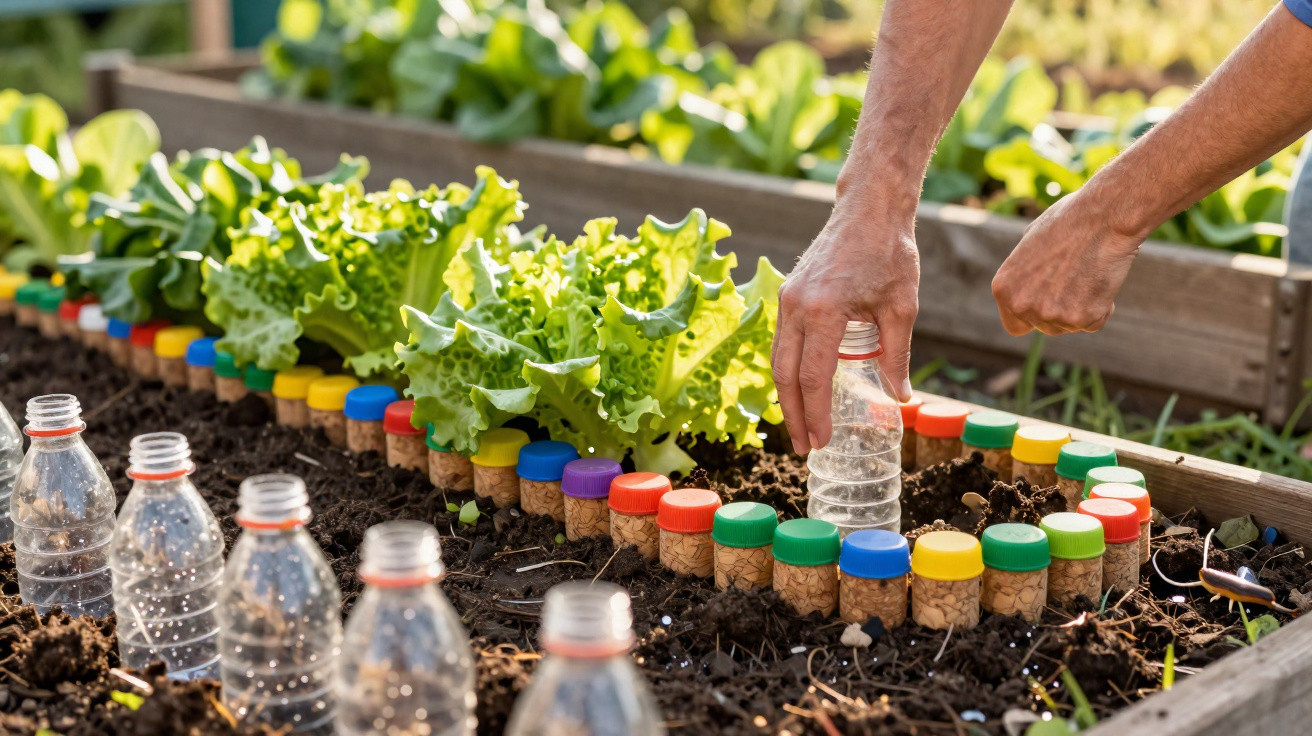
Anyone who looks after a vegetable bed in summer knows the problem: either you’re forever hauling a watering can around, or the plants start drooping. And just when everything finally puts on strong growth, slugs and other pests turn up. A simple trick using leftover bits from bottles in the kitchen can ease both issues at the same time.
How bottle leftovers became quiet helpers in the garden
The turning point came after a classic spring in the vegetable bed: young plants scorched in the sun, lettuces were nibbled overnight, and the water bill crept up. Meanwhile, the small leftover parts from every empty bottle were tossed into the bin or recycling without a second thought.
That’s where the unused potential was hiding. Over a year, households accumulate surprising numbers of these unremarkable little pieces. Instead of throwing them away straight away, a few simple steps can turn them into practical tools for the vegetable bed: for more even watering, protection from nibbling pests, and sturdier supports for plants.
"A simple bottle leftover can become a fully working mini-irrigator that delivers water straight to the roots and, at the same time, helps keep slugs away from tender young plants."
Why bottle caps are perfect helpers in the vegetable bed
Plastic as a precise water regulator
Plastic bottle caps have one big advantage: they seal tightly, cope well with moisture and sunshine, and are easy to work with. Add a tiny hole and you can turn almost any bottle into a simple but surprisingly effective drip irrigation system.
Screw the cap onto a filled bottle, flip it upside down and push it into the soil: water then drips out in very small amounts directly into the root zone. Nothing runs off to the side, and far less evaporates uselessly from the surface. Crops such as tomatoes, courgettes and aubergines benefit in particular, because their roots prefer deep watering while the foliage should stay as dry as possible.
- No wet carpet of leaves that encourages fungal diseases
- Much less evaporation than watering from above
- Water goes exactly where the roots need it
- You save time because you don’t have to water as often
Cork stoppers as a mini reservoir and protective ring
Natural cork leftovers bring different strengths: their porous structure works like a small sponge. They soak up excess moisture and release it back into the soil gradually as the ground dries out. Placed right at the base of the plant, they create a kind of buffer against drought stress.
There’s also an interesting chemical angle. Natural substances in the material give off a scent that can irritate certain insects and crawling pests. Aphids, ants and some small gnats tend to avoid the area, without any need for chemical treatments. At the same time, the cork acts like a thin insulating layer on the soil: on hot days the area around the stem heats up less, and on cool nights the soil stays a little milder.
Step by step: build drip irrigation from bottles yourself
For a basic version of this semi-automatic watering, you only need items most households already have:
- A plastic bottle (0.5 litre for young plants, 1.5 litres for larger plants)
- The matching cap
- A sewing needle or a thin nail
- A lighter or another small heat source
- A craft knife or a sharp kitchen knife
You can put it together in just a few steps:
- Heat the needle briefly so it slides through the plastic more easily.
- Carefully pierce the centre of the cap - start with a very small hole.
- Fill the bottle, screw the cap on, and test it over the sink.
- Aim for one drip every two to three seconds. If the flow is too strong, use a new cap and make a smaller hole; if it’s too weak, enlarge the hole very slightly.
- Cut off the bottom of the bottle cleanly so you can top it up easily from above later.
When fitting it into the vegetable bed, a distance of about 10–15 cm from the base of the plant works well. Push the bottle in upside down with the neck into the soil, about 5–10 cm deep. Firm the soil around it so it seals tightly.
In spring, topping up once a week is usually enough. During heatwaves, intervals of two to three days make more sense. For seed trays and young plants, the same method works on a smaller scale: smaller bottles and even finer holes so the compost doesn’t turn to sludge.
More than just water: how the trick also keeps slugs away
Lure traps made from plastic caps
The very same type of plastic cap can be used in a completely different way in the vegetable bed: press it flat into the soil and fill it with beer or sweet syrup. These mini dishes act as small lure traps that attract slugs. Rather than heading straight for young lettuce leaves, they gather at these points.
If you want to be kinder to wildlife, use this approach in moderation: place the traps a little away from vulnerable plants and collect the attracted slugs daily.
Rough barrier rings against slime trails
From the natural cork material, you can cut protective rings and place them directly around stems. The rough surface is extremely unpleasant for slugs and snails. They avoid the area, which can make the difference between a tender young plant being stripped bare or staying intact.
For container plants, a thin layer of shredded cork spread over the soil surface can help as well. This mulch layer keeps the compost moist for longer and creates another uncomfortable zone for crawling pests.
Invisible helpers: drainage, root protection and safety
These small leftovers are also useful in places you won’t even see day to day. Mixed into the base of a pot or the lower third of planters, they open up the compost and improve drainage. Waterlogging becomes less likely, so roots are less prone to rotting.
In the vegetable bed, they can be distributed among sensitive roots. There, the natural material holds both moisture and small air pockets. Roots don’t have to grow straight into compacted, wet soil; instead they develop into a looser, more aerated zone.
Another practical use is as a cover for sharp poles and canes. Anyone using supports for climbing plants knows the risk: it’s easy to walk into them. Slip a leftover piece onto the ends and they’re easier to spot and much safer.
How this changes day-to-day life in the vegetable bed
With a few dozen reused bottle leftovers, the watering routine becomes noticeably more relaxed. Instead of grabbing the watering can several times a day, you can often stick to a set rhythm of checking and topping up. People who work and only see their beds in the morning or evening benefit particularly.
Plants respond with steadier growth. Rather than swinging between drought and sudden heavy watering, they receive a constant trickle in small amounts. This encourages stronger roots and reduces stress - a factor that can measurably affect both yield and flavour.
There’s an environmental upside too: every bottle leftover reused saves raw materials, and every skipped watering round reduces water consumption. In dry summers, every litre that isn’t wasted matters.
Risks, limits and sensible combinations
It still isn’t a set-and-forget solution. If you push bottles into the soil without testing, you risk either parched ground or flooded root zones. Getting the hole size right is the crucial step. The soil also shouldn’t be completely compacted into sludge, otherwise the water won’t spread properly.
In very light sandy soils, water drains through quickly. Here, it’s worth combining the bottles with organic mulch: grass clippings, leaves or chopped plant material around the bottle slow down percolation and keep more moisture in the root area.
The slug effect is strongest when you pair the trick with other measures: early hand-picking, as few hiding places as possible (such as boards or piles of stones) close to plants, robust varieties, and planting densely enough to avoid open gaps.
Anyone who equips their garden this way over the long term will notice routines shifting over time: fewer frantic watering dashes and more targeted care. What looked like worthless waste becomes a quiet helper that saves water, protects plants and makes the vegetable bed that bit more manageable day to day.
Comments
No comments yet. Be the first to comment!
Leave a Comment