
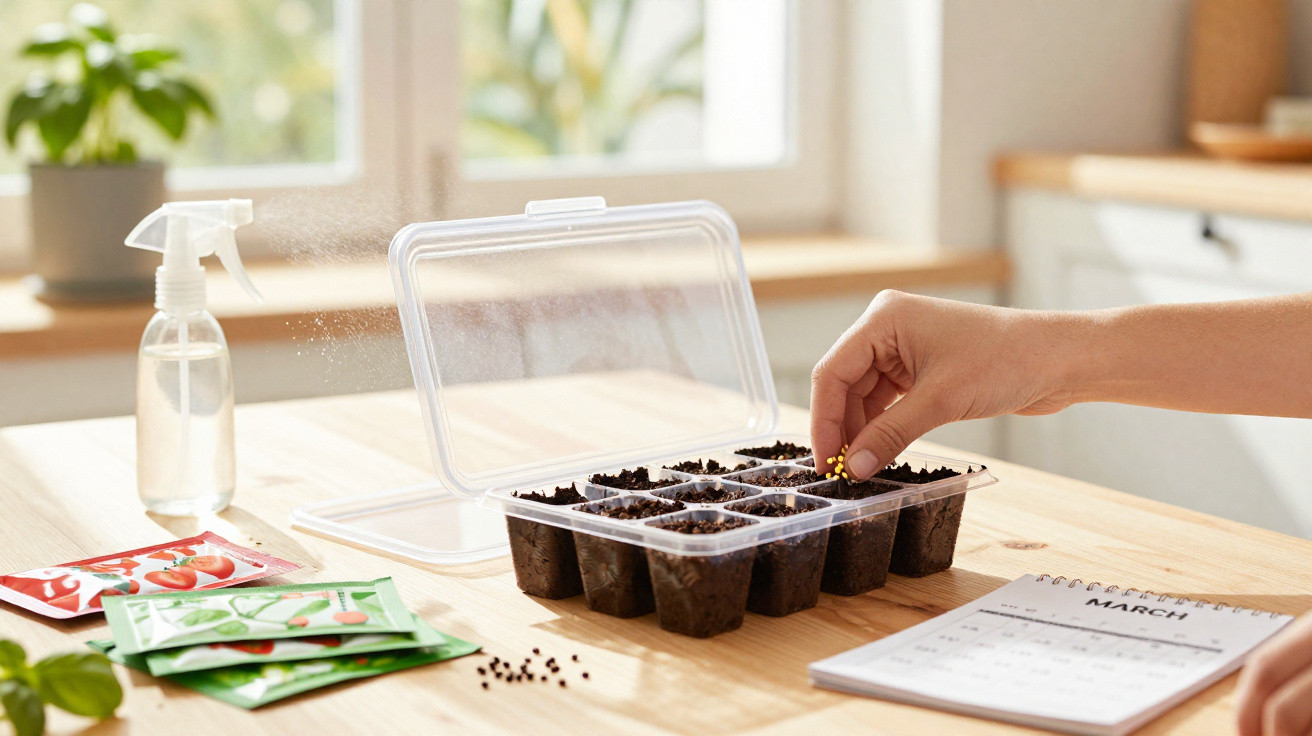
Many amateur gardeners begin spring sowing full of anticipation - only to end up with mouldy pots and seedlings that grow tall, pale and weak.
March, in particular, tends to decide whether sowing becomes a success or a disappointment. Temperature, light and moisture levels swing about, window sills get crammed, compost either dries out far too fast or gets waterlogged. A small, unassuming mini kit from Action for 1,99 Euro claims to tackle exactly these early hurdles, using a simple, compact set-up designed to make the tricky start much easier - especially for beginners.
The budget mini set from Action that saves your first sowing
In Action’s garden section there’s a small accessory called “Escargot à graines My Garden”, price: 1,99 Euro. The name is playful, but the concept is genuinely smart: a space-saving system for pre-germination and raising seedlings on a window sill.
What’s in the set - and what each part does
The kit includes just a few components, but together they form a tidy, self-contained system:
- A growing pot that provides a stable base
- Two elastic bands for fastening everything in place
- A seed-rolling strip (about 60 × 10 cm) that gets rolled up into a kind of “snail”
The strip acts as the sowing carrier. You loosely add compost, roll it up, and secure it with the elastic bands. The pot holds the “snail” upright. This creates tight, clearly defined rows that are easy to check at a glance.
“The basic idea: bring order to sowing, manage moisture better, and limit mistakes right from the start.”
Why March is the ideal time
In March, many gardeners begin their first indoor sowings. Outside, it’s still too cold; indoors, conditions are only partly suitable: days are getting longer, yet light is often still insufficient, central heating dries the air, and nights near the window can be noticeably cooler.
That’s exactly where the kit shows its strengths. Seeds sit close together in one compact unit, moisture is easier to keep even, and everything stays in one place rather than being spread across five different pots.
Common sowing mishaps the set helps you avoid
If you’ve ever stared at brown, soggy compost in March, you’ll know the usual problems. This system mainly helps prevent three frequent mistakes.
Too much water, seeds sown too thickly, and total chaos
The “snail” format tackles several issues at once:
- Overwatering: because the roll is slim, you can apply water in small amounts with a spray bottle or a watering can fitted with a rose. Pools of standing water are much less likely.
- Sowing too densely: the rolling strip encourages a bit of discipline. If you sprinkle reasonably evenly, you avoid clumps of seed.
- Window-sill mess: one container and a visible structure means fewer mix-ups and less spilled compost.
If you also label your varieties, you can keep track even when you’re running several “snails” at the same time.
The real secret of successful gardeners: consistency, not luck
Experienced gardeners rarely depend on chance. Successful sowing usually comes down to one thing: stable conditions, day after day. This set can’t magically create perfect conditions, but it makes them far easier to control.
Moisture under control: not dry, not soaking wet
Seeds need an environment that stays evenly, lightly moist. Compost that’s too wet can halt germination; compost that dries out can make seeds “switch off” again. In the roll, water tends to spread sideways rather than collecting in one corner.
If you check the surface daily, you’ll quickly see whether a quick misting is needed. That routine gets you far closer to ideal conditions than the classic “water heavily once and hope for the best”.
Temperature: not an ice-cold window, not a sauna spot above the radiator
On a window sill, temperature can easily swing by several degrees. Ideally, keep the sowing in a moderately warm, draught-free spot - not right by a cracked-open window and not directly on top of a radiator.
Because everything sits in one pot, you can shift the position easily if needed - closer to the brighter window during the day, then a little further into the room at night.
Light at the right time so seedlings don’t go leggy
As soon as the first seedlings appear, good light becomes urgent. If light is lacking, plants stretch upwards thin and pale. With the upright “snail”, the seedlings are positioned so they’re more evenly oriented towards the window.
A simple habit helps: turn the pot slightly every one to two days. That encourages straighter, sturdier growth.
Step by step: sow like a pro in around 15 minutes
The kit is straightforward, and so is the process. Stick to a few basics and you’ll significantly improve your success rate.
Choose the right compost
A fine, loose seed compost works best for the roll. Peat-free seed compost is a good choice; the key is an airy texture and low nutrient content. Moisten the compost before filling - damp, not dripping.
Fill, press lightly, sow sparingly
- Lay the rolling strip out flat.
- Spread a thin, even layer of compost.
- Press it down very gently with your hand or a small board.
- Sprinkle seeds with spacing - not like pepper from a grinder.
- Carefully roll the strip up and stand it in the pot.
- Secure it with the elastic bands so it can’t spring open.
What matters is that the seeds touch the compost but don’t end up buried too deeply. A simple rule of thumb: sow no deeper than the seed is thick.
Water gently, without washing everything away
Once rolled, mist or water with a fine rose. The surface should darken, but it shouldn’t turn into brown soup. Many small waterings over time are safer than occasional heavy drenches.
Cover, ventilate, and keep an eye on it
A loose cover of clear film or a propagator lid can reduce evaporation during the early stage. Brief ventilation once a day is often enough to discourage mould. As soon as you can see the first tips emerging, start leaving the cover off more and more.
Which crops are especially suitable in March
March is an ideal month to try the set out. Plenty of vegetables and herbs can be started indoors now.
Popular vegetables for early raising
- Tomatoes: generally easy to germinate, but they benefit from steady conditions.
- Peppers and chilli: prefer warmth and respond very well to consistent moisture.
- Early salads: butterhead, cut-and-come-again types and similar varieties get going quickly.
- Brassicas: depending on your region and plans, early types can already be started.
Fragrant herbs that start better indoors
Some kitchen staples grow far more reliably from seed if they can begin life indoors:
- Basil: loves warmth, dislikes cold, and suits window-sill sowing.
- Parsley: slower to germinate and benefits hugely from consistent moisture.
- Chives: uncomplicated and encouraging for beginners because you soon see something green.
Flowers that take off in summer
If you want a colourful border in summer, you can start annual summer flowers in March - especially types that handle pricking out well, such as zinnias, marigolds or cosmos. Early-raised young plants often reward you with a longer flowering season.
If nothing germinates despite the set: read the signs and adjust
Even with helpful tools, sowing is a living process. When something goes wrong, attentive gardeners usually spot the warning signs early.
Too much moisture: symptoms and quick fixes
If the top edge of the roll stays slimy, or the first stems suddenly collapse, you’ve used too much water. In that case:
- pause watering
- remove any cover
- improve air circulation
Let the surface dry slightly without letting the whole roll dry out. That helps halt rot, and any healthy seedlings can recover their stability.
Too little light: rescuing leggy seedlings
Long, thin shoots with small leaves are a clear sign of insufficient light. The only real remedy is a brighter position, ideally right by a south-facing window. Some plants, such as tomatoes, can later be potted on a little deeper to make them more stable.
The wrong temperature: tweak it rather than starting again
If nothing germinates at all, check the temperature. Many crops germinate most reliably at 18 to 22 °C. If the roll sits permanently on a cold north-facing window or in a draughty hallway, moving it to a warmer spot can be enough to get things going.
From roll to bed: helping plants head into the season strong
Once germination is successful, the second - often overlooked - stage begins: turning delicate seedlings into robust young plants that can cope outdoors with wind, rain and shifting temperatures.
The right time to prick out
As soon as the first “true” leaves appear alongside the seed leaves, many crops can be moved into individual pots. Act too soon and you risk damaging tiny roots; leave it too long and you’ll end up with thin, stretched plants competing too heavily within the roll.
Hardening off before going outside
Before the young plants finally move into the bed or larger containers, they should acclimatise to fresh air for a few days. Start with one to two hours in a sheltered spot, then gradually extend the time. This makes the transition much easier for them.
How the set stays useful all summer
The 1,99‑Euro set doesn’t become redundant after the first March sowing. It also works well for:
- further sowing waves in April and May
- re-sowing to fill gaps in the bed
- first attempts with cuttings or experiments with new varieties
Because the system is small and uncomplicated, it tends to stay within reach rather than being forgotten in the shed. Once you get used to a simple routine - controlled moisture, a steady spot, and regular checks - you’ll quickly notice that the much-talked-about “green fingers” suddenly feel far more achievable, and have less to do with talent than with a well-managed start to the season.

Comments
No comments yet. Be the first to comment!
Leave a Comment