
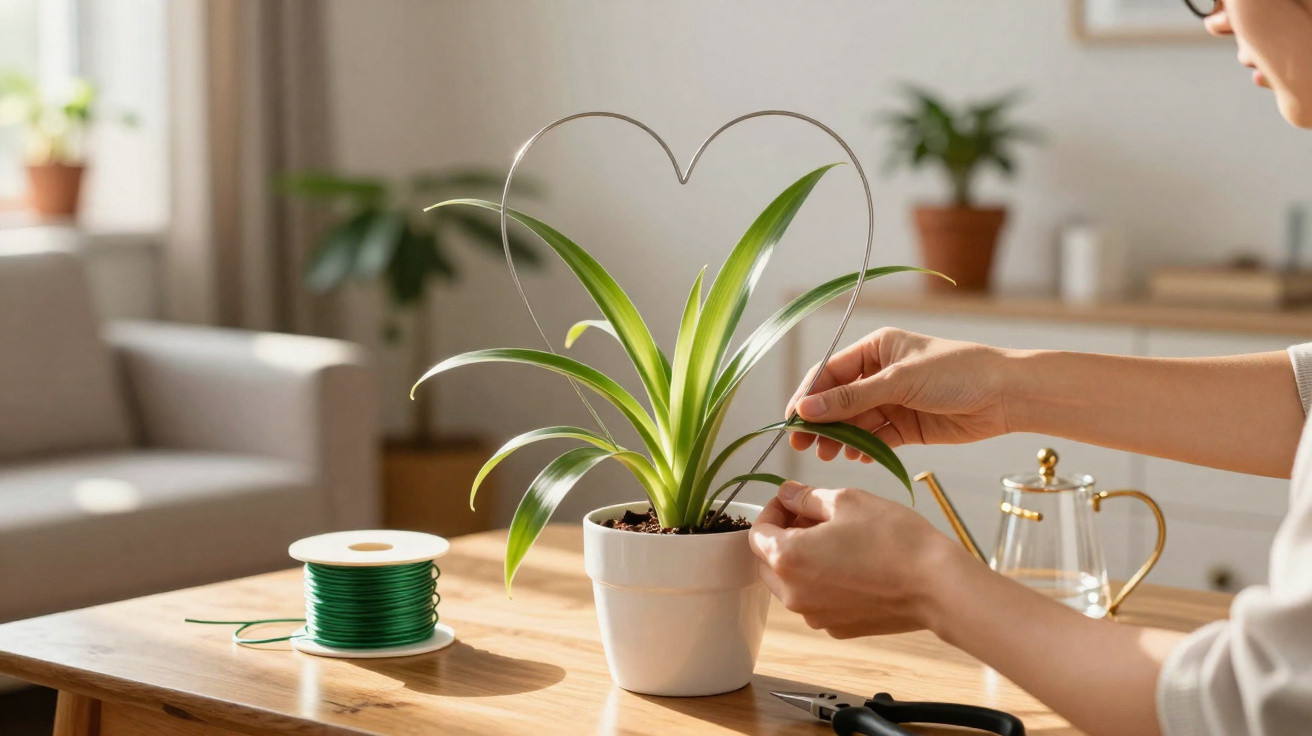
Many people have a slightly neglected spider plant sitting somewhere in the living room or hallway. It’s tough, low-maintenance, safe around pets - and, visually, often a bit unremarkable. With one simple, almost playful tweak, however, this everyday houseplant can become a real focal point that looks like a piece of green art.
The humble spider plant as raw material for green design
The spider plant (botanically Chlorophytum comosum) is one of the classic indoor plants. It shrugs off dry spells, copes well with low light, and keeps growing reliably. Those exact traits make it ideal for shaping into decorative forms.
What makes it distinctive are the long, thin runners, which produce small leaf rosettes at their ends - the so-called plantlets (offsets). These baby plants dangle like miniature specimens in mid-air. And those runners are perfect for training into shapes.
"If you guide the runners of your spider plant instead of letting them hang freely, you can create hearts, wreaths or even full columns of leaves."
In other words, the plant becomes a living building material. Rather than letting the foliage simply spill over the pot edge, you steer the growth and give it a clear structure. The result: a plant with a “granny” reputation turns into a contemporary decorative object.
Step one: think of the spider plant as a living sculpture
Before you start, take a close look at your plant. Which runners are the longest? Where are there lots of plantlets? Which side looks lush, and which side is a bit sparse?
- choose long, healthy runners
- prioritise runners carrying lots of plantlets
- remove weak or dried-out runners
- rotate the pot so the best runners face forwards
Spider plant runners are surprisingly flexible. If you bend them slowly and gently, they usually won’t snap - which is exactly why they’re so well suited to clean, graphic shapes.
Why a wire frame works so well
For many designs, a simple armature made from aluminium wire is enough. It’s lightweight, barely rusts, and can be shaped by hand. Slightly thicker craft wire (for example, model-making wire or florist wire) works particularly well.
For instance, you can:
- form a circle - for a green wreath
- join two arcs into a heart
- bend oval or teardrop-shaped frames
Push the wire into the compost or span it in a semicircle over the plant. It acts as a “guard rail” that you can guide the runners along.
Hearts, wreaths and more: how to shape your spider plant
Once you’ve chosen a shape, the real modelling begins. Work with one runner at a time and move slowly. The plant adapts more easily when you reposition it in small stages.
Option 1: a green wreath as a table highlight
For a wreath, you’ll need a round wire hoop that’s slightly larger than the pot’s diameter. Insert the hoop at a slight angle into the compost or secure it to the rim of the pot.
Then guide the long runners around the circle one by one:
- lay the runner carefully around the wire; don’t pull it too tight
- fix it loosely with soft plant clips or raffia
- position the plantlets so they face outwards
- remove excess plantlets and keep them for potting up
Over the following weeks, the plantlets continue to grow, gaps fill in, and the wreath looks fuller. On a dining table, it creates a green frame you can easily see through, so it adds atmosphere without blocking anyone’s view.
Option 2: a heart shape for special occasions
For a heart, first bend the wire into two arcs and shape a point at the bottom. The frame sits with its lower point pushed into the pot. Then lay the runners along the curves.
In an entrance area or on a chest of drawers, this plant heart quickly becomes a talking point. Especially when paired with candles or fairy lights, it creates a very personal look.
The braided column: from trailing cushion to green totem
If you want more height, use a different approach: braiding. Here, several runners work together to create a kind of green column.
You’ll need:
- at least three long runners
- a sturdy wooden stake for support
- a few soft ties (coated garden wire or raffia)
Push the wooden stake into the centre of the pot. Then place the runners around it and start braiding - much like plaiting hair:
- position three runners against the stake and lightly secure them at the base
- braid them evenly and loosely around each other
- every few centimetres, add a gentle tie for support
- at the top, let the ends taper off loosely or wrap them around the stake
"This turns a sprawling spider plant into a slim, vertical plant column that fits perfectly into narrow corners."
A braided column looks especially good beside an armchair, at the end of a low sideboard, or next to a bookcase. In small bedrooms, even a scaled-down version on a bedside table can add a calm, green accent.
Where the plant sculpture works best at home
Placement determines whether your new shape looks merely “nice” or becomes a true highlight. Spider plants prefer bright, indirect light. Strong direct sun from south-facing windows can scorch the leaves quickly.
Popular spots include:
- the centre of the dining table - as a low wreath
- a hallway console - as a heart or oval
- a narrow corner next to the TV unit - as a slim column
- a bedside table in small rooms - as a mini column or small arch
One key point: the plant needs breathing space. Don’t put it right against cold windows in winter or directly in front of radiators. Warm, dry air tends to turn leaf tips brown.
Care after shaping: keeping the sculpture healthy
After bending, braiding and tying, the spider plant needs a little time to recover. A few simple steps can help it through this phase.
Getting nutrients and water right
A liquid fertiliser with two main nutrients - nitrogen and potassium - is perfectly adequate to begin with. A light dose every two to three weeks during the growing season encourages new plantlets and strong green foliage.
When it comes to watering: it’s better to water thoroughly once than to keep adding small amounts. Let the compost dry slightly, but don’t allow it to dry out completely. Waterlogging can quickly cause root rot, especially in densely planted pots with lots of plantlets.
Indoors or outdoors - where the limit is
In very mild areas, a spider plant can move outside during the warmer months, for example onto a sheltered balcony. The temperature should stay consistently above about 13 °C. If it drops below that, it’s time to bring the plant back indoors.
Outside, growth is often more compact and robust, and the leaf colour contrast becomes stronger. Wire shapes and braided columns can simply go out with it, as long as the pot and frame remain stable.
Extra ideas and useful tips for creatives
Many hobby gardeners only see spider plantlets as propagation material. In fact, they’re also ideal for strengthening the base of your sculpture. If you plant a few offsets directly into the compost near the main plant, the centre becomes denser and bushier over time. The contrast between a compact core and the delicate forms above it can look especially striking.
If you enjoy the styling aspect, you can combine other houseplants in the same pot. Small succulents or moss around the rim can create a calming carpet, while the spider plant rises into airy shapes. The important thing is that companion plants have similar light and watering needs.
One last point: always use soft, flexible ties. Rigid wire or sharp edges can cut into the runners as they thicken. Garden centres sell purpose-made clips and tapes, but a strip of fabric or raffia will do in a pinch. Every few weeks, check whether anything is digging in and loosen ties if necessary.
Once you get into this kind of “plant shaping”, you’ll quickly notice: a single hardy spider plant can become a whole series of living objects - from a simple table wreath to an ornate heart or an impressive column in the living room.
Comments
No comments yet. Be the first to comment!
Leave a Comment